Great listing photography is more than just point-and-shoot. It’s the art of telling a property's story in a single glance, turning a casual scroller into a serious buyer. Done right, it's a powerful marketing tool that can sell a home faster and for a higher price.
The True Impact of Professional Real Estate Photography
Think about it: most buyers start their house hunt online. Your listing photos are their first handshake with the property. Dark, blurry smartphone pictures are an instant turn-off, causing potential buyers to scroll right past what could be their dream home. Professional visuals, on the other hand, stop them dead in their tracks.
Calling high-quality real estate photography an "expense" misses the point entirely. It's a direct investment in your listing's success.
The numbers don't lie. This is a massive and growing part of the industry. The global real estate photography market hit $2.4 billion in 2024 and is on track to nearly double by 2035. For agents on the ground, the ROI is immediate: listings with professional photos pull in 47% more online views and generate up to 39% more inquiries than those with amateur shots. You can dive deeper into these industry trends and their impact.
Shaping Buyer Perceptions Instantly
Long before a buyer bothers with the property description or the square footage, they're looking at the pictures. That first visual impression frames their entire opinion of the home. Professional images don't just look better; they signal quality, care, and value, subtly suggesting the property itself is well-maintained.
What makes that positive first impression? It boils down to a few key things:
- Bright, Welcoming Spaces: Good lighting is non-negotiable. It makes rooms feel bigger, cleaner, and more inviting.
- Accurate Colors: Professional editing ensures the paint on the walls and the finish on the floors look just like they do in person.
- Crisp, Clear Details: Sharp focus draws the eye to the good stuff—the custom countertops, the crown molding, the little details that buyers actually care about.
A buyer often decides whether to book a showing within the first few seconds of seeing a listing online. Your photos are your only chance to make those seconds count.
Moving Beyond Traditional Methods
Here’s the good news: you no longer need to hire expensive photographers with week-long turnaround times to get magazine-worthy shots. Modern tools are putting the power to create incredible visuals right in the hands of agents. For instance, AI assistants like Bounti can pull MLS-ready photos straight from a simple video you shoot on your phone.
This shift means you can take full control of your marketing. Imagine offering sellers AI-powered decluttering or instant virtual staging to show off a home's true potential. By mastering these skills, you’re not just selling a house; you’re winning more listings, closing deals faster, and building a brand that stands out.
Strategic Planning Before You Ever Touch a Camera
Great real estate photography doesn't happen by accident. The shots that make buyers stop scrolling are always the result of a solid game plan, long before the camera even comes out of the bag. Honestly, one hour of focused prep can easily save you three hours in post-processing and completely change the quality of your final images.
It all starts with getting inside a buyer's head. You need to know what they're looking for, which means understanding modern property preferences. When you know what features matter most, you can build your entire shoot around highlighting them, ensuring your photos resonate from the very first click. A well-prepared space is your single biggest advantage.
This flow says it all—good photos drive engagement, which leads to a faster sale.
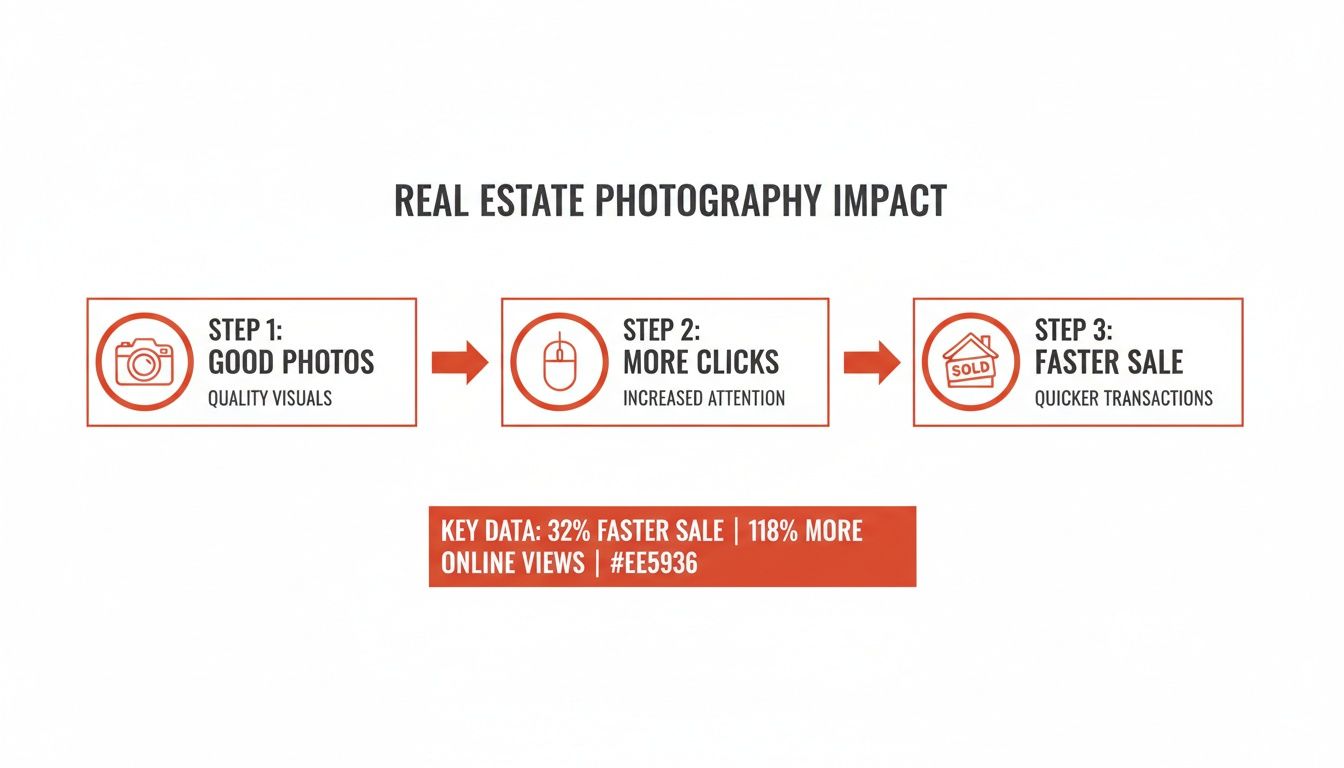
There's a straight line from quality images to a closed deal, which is exactly why this planning stage is where the real work begins.
Creating an Effective Shot List
Never, ever walk into a property and just start shooting. You need a plan. A simple shot list is your roadmap for the day, making sure you nail every key detail and show off the home’s best angles.
And I don't just mean a list that says "kitchen, living room, bedroom 1." Get granular. Think about the story you're trying to tell.
- Highlight Key Features: Be specific. Note things like "gorgeous morning light in the kitchen," "custom-built office shelving," or the "dramatic vaulted ceiling in the great room."
- Capture the Flow: Plan shots that illustrate how the spaces connect, like a wide view from the living room looking into the dining area. This helps buyers mentally place themselves in the home.
- Don't Forget the Details: Add the small things that pack a punch. Think unique tile backsplashes, cool modern light fixtures, or a cozy fireplace nook.
This isn't just about checking boxes; it's about forcing yourself to see the property through a buyer's eyes and focusing on the things that will make them fall in love.
Scheduling Around Natural Light
Timing is everything. When you schedule the shoot has a massive impact on the vibe of your photos. The goal is to work with natural light, not fight it.
For interiors, your best friend is bright, indirect light. This usually happens mid-morning or early afternoon when the sun isn't blasting directly through the windows, which creates harsh, distracting shadows and blown-out hotspots.
A rookie mistake is booking a shoot for high noon, thinking the brightest sun is the best. In reality, the softer, more diffused light of off-peak hours creates a far more welcoming and flattering look inside.
When it comes to the exterior, you can't beat the "golden hour"—that magical first hour after sunrise and the last hour before sunset. The light is warm and soft, adding incredible depth and curb appeal to the home's facade and landscaping.
The Homeowner Prep Checklist
Look, you can't do it all yourself. A prepared home is the foundation of a great shoot. The best way to get there is by giving the sellers a simple, actionable checklist. It empowers them to get the space ready, which makes your job infinitely easier and the results way better.
Break it down by area so it doesn't feel overwhelming:
General (All Rooms)
- Declutter Everything: Personal photos, mail on the counter, fridge magnets—it all has to go.
- Deep Clean: Dust, vacuum, and mop. Every surface should sparkle.
- Clean All Windows: Make sure they're streak-free, both inside and out.
- Replace Burned-Out Lightbulbs: Check every single lamp and overhead fixture.
Kitchen & Bathrooms
- Clear All Countertops: Remove everything except maybe one or two tasteful decorative items.
- Hide Trash Cans: Tuck them away in a pantry, closet, or garage.
- Put Away Toiletries: Soap, toothbrushes, and shampoo bottles need to be out of sight.
- Use Fresh Towels: Hang clean, matching towels neatly. Don't use the everyday ones.
By setting these expectations upfront, you're creating a partnership with the homeowner. You're both working toward the same goal: making the property look its absolute best. To see just how big of a difference this makes, check out these https://bounti.ai/blog/staging/house-staging-before-and-after. This prep work is the final piece of the puzzle before you even think about pressing the shutter.
Your Essential Gear and Camera Settings
Let's get one thing straight: you don't need a truckload of expensive equipment to shoot beautiful real estate photos. It’s a common misconception that more gear equals better pictures. The truth is, a photographer's skill and a few specific pieces of equipment make all the difference.
The real goal is to get gear that solves the unique challenges of shooting indoors—capturing wide spaces cleanly, keeping everything sharp, and getting stable, consistent shots. It's about investing smart, not just spending big.
The Non-Negotiable Core Kit
If you're just starting out or finally ditching your smartphone, there are three things that absolutely form the foundation of a professional real estate photography setup. Cutting corners here will show up in your final images, but a solid investment in these items will pay off on every single shoot.
A Camera with Manual Mode: This could be a DSLR or a mirrorless model. What truly matters is the ability to take full control of the settings. Letting the camera's auto mode guess what you want is a recipe for mediocre interior shots.
A Wide-Angle Lens: This is, without a doubt, the single most important piece of gear you’ll buy. It’s what allows you to capture the entire feel of a room, making it look spacious and appealing online. A lens in the 16-24mm range (for a full-frame camera) is the industry sweet spot.
A Sturdy Tripod: This is not optional. A tripod completely eliminates camera shake, giving you tack-sharp images even in dim lighting. It's also the key to bracketing your shots for HDR (High Dynamic Range) processing, a technique we'll get into later.
Get these three pieces right, and you’re set. This core kit will handle more than 90% of what you'll encounter on any typical listing. You can always add more toys later.
Dialing in Your Camera Settings
Having the right gear is only half the battle. Knowing how to use it is what separates the pros from the amateurs. And don't worry, it's not as complicated as it sounds. For most interior shots, you can stick to a simple, repeatable set of "go-to" settings.
Your main goal is to get the entire room in focus, from the couch in the foreground to the view out the window. This is called a deep depth of field. At the same time, you want to let in as much natural light as possible without creating grainy "noise" or motion blur.
Think of your camera's "Auto" mode as your enemy. It’s built for snapshots, not for capturing architecture. Taking manual control of your aperture, ISO, and shutter speed is the first real step toward producing professional-grade images.
To pull this off consistently, you just need to master three settings:
Aperture (f-stop): Lock this in somewhere between f/8 and f/11. This range is the sweet spot for a deep depth of field, keeping everything in the room sharp. Anything wider (like f/4) creates unwanted blur, while going too narrow (like f/16) can ironically make the image softer.
ISO: Keep this as low as your camera will go, usually 100 or 200. A low ISO means a clean, high-quality image without any digital grain. Since you're using a tripod, you don't need to bump up the ISO to compensate for lower light.
Shutter Speed: This is the only setting you'll really need to change from room to room. With your aperture and ISO fixed, just adjust the shutter speed until your camera's light meter says the exposure is right. In a bright, sunny room, it might be 1/60th of a second. In a darker space, it could be a full second or longer—which is exactly why you have a tripod.
This simple workflow—fix the aperture and ISO, adjust the shutter speed—is the backbone of efficient and effective real estate photography. It creates a repeatable process for perfectly exposed, razor-sharp photos every single time.
Recommended Camera Settings for Real Estate Photography
Here’s a quick-reference table to help you nail your settings on-site. Think of this as your starting point for getting crisp, well-exposed shots in common scenarios you'll face every day.
Remember, these settings are designed to work together. By keeping your ISO low and aperture in the mid-range, you let the shutter speed and your tripod do the heavy lifting to capture all the light and detail you need.
Mastering On-Site Composition and Lighting
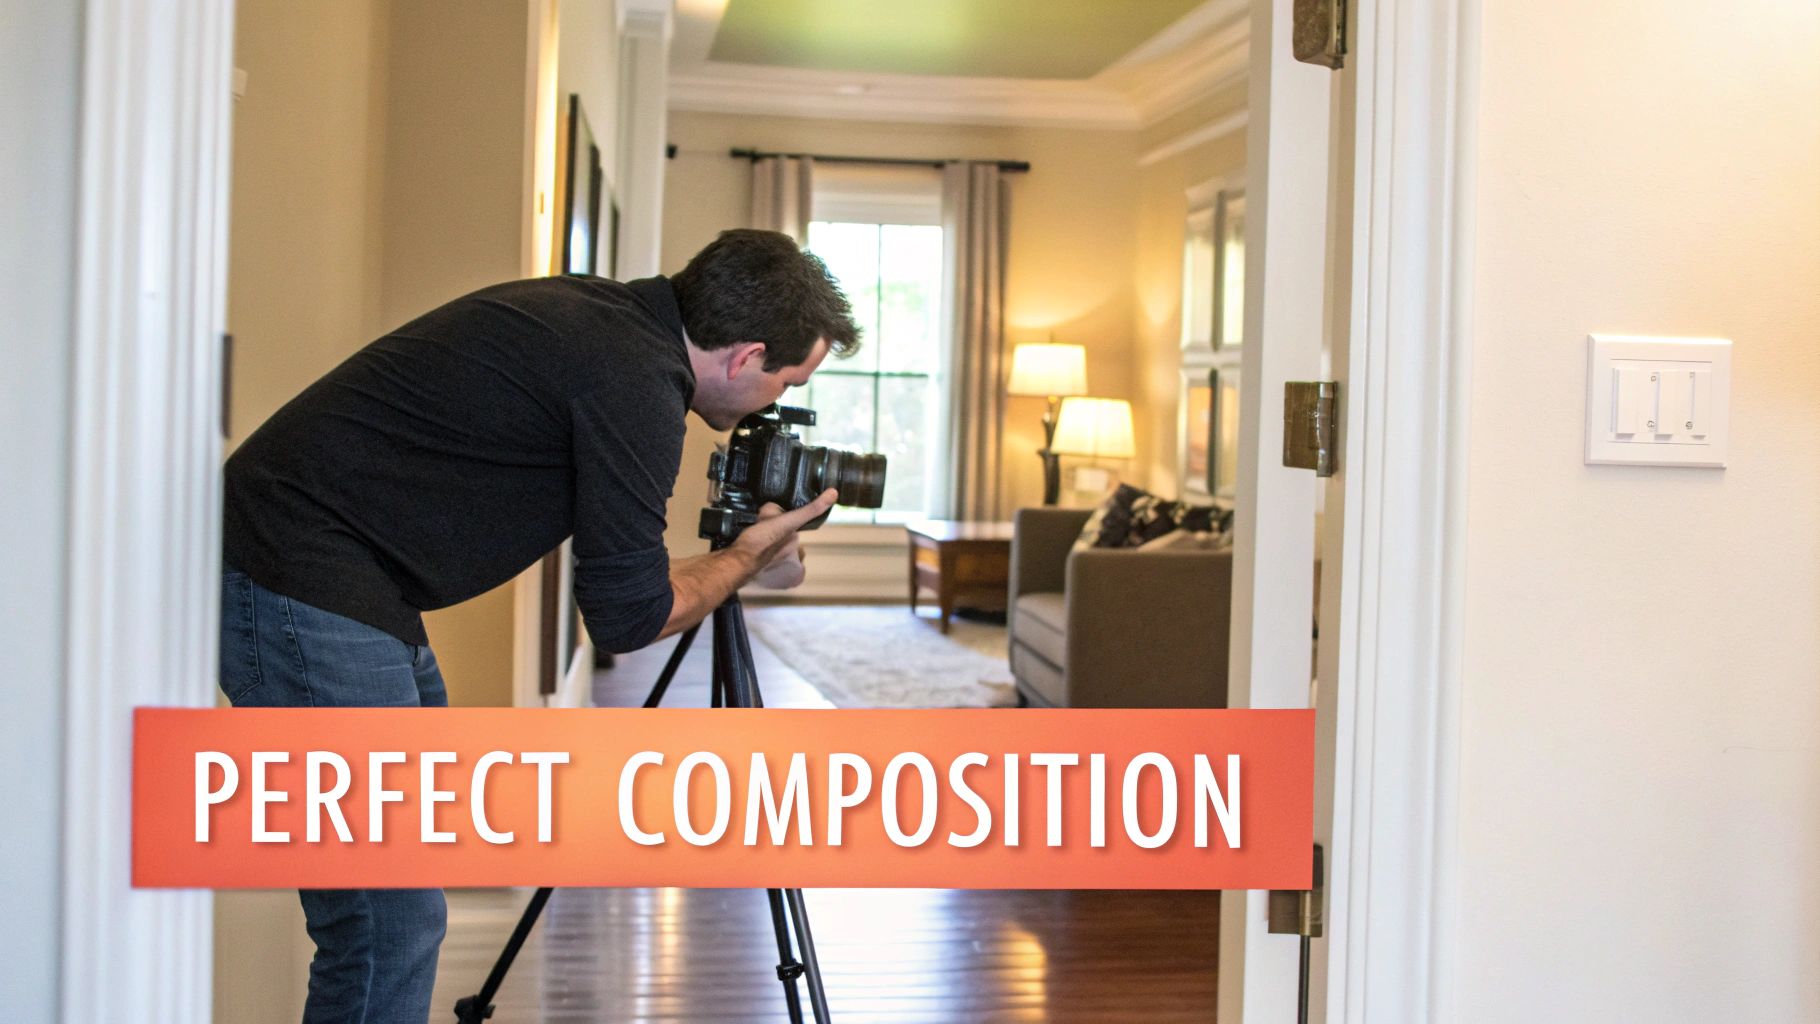
With your gear ready and your camera settings dialed in, the purely technical part of the job is over. Now, the artistry begins. This is where you move from just documenting a space to truly selling it, using composition and light to tell a story that makes a buyer feel at home before they ever step inside.
Great composition isn't about following rigid rules; it’s about guiding the viewer's eye. You want to lead them through the room, show off the best features, and create a sense of balance and space. This is how you transform a simple photo into a powerful marketing asset.
Finding the Perfect Angle and Height
The first decision you make in any room is where to place your tripod. The height of your camera has a massive impact on the final image. A common mistake is shooting from too high or too low, which distorts the perspective and makes the room feel unnatural.
Your goal is to shoot from roughly chest height, typically between four and five feet off the ground. This perspective mimics how a person would naturally view the space, creating an immersive and relatable feeling. It keeps vertical lines straight and prevents furniture from looking skewed or disproportionate.
Once you have the height, find your angle. Shooting from a corner is a classic real estate photography technique because it shows two walls and makes the room feel as large as possible. However, don't be afraid of straight-on shots, which are incredibly powerful for creating symmetry. A shot looking straight down a hallway to a bright living room can be more compelling than a standard corner view.
Applying Timeless Composition Rules
You don't need a degree in art history to compose a beautiful shot. A few basic principles will dramatically improve your images. These aren't strict laws, but rather proven guidelines for creating visually appealing photos.
The Rule of Thirds is your best friend. Imagine a tic-tac-toe grid over your screen. Instead of placing the main subject—like a fireplace or a statement kitchen island—dead center, position it along one of the lines or where two lines intersect. This creates a much more dynamic and interesting composition.
Another powerful principle is using Leading Lines. Look for natural lines within the space that can guide the viewer's eye toward a focal point.
- The edge of a kitchen island can point toward a high-end stove.
- A long hallway can draw the eye to a stunning view from a large window.
- The pattern of hardwood floors can lead into the next room, showing the home's flow.
These techniques turn a passive viewing experience into an active one, inviting the buyer to explore the space visually.
Working With Light Not Against It
Lighting is the element that creates mood. Your job is to balance the different light sources in a home to produce a bright, warm, and inviting atmosphere. The biggest challenge is almost always the windows.
Natural light from windows is beautiful but often much brighter than the interior of a room. This massive difference in brightness is what can cause blown-out, white windows or dark, shadowy interiors. One of the best ways to solve this is by bracketing your exposures. You can learn more about how to master this technique in our guide to HDR photography for real estate.
Always turn on every single light in the room before you start shooting. Overhead lights, table lamps, under-cabinet lighting—everything. This adds layers of warmth and dimension, making the space feel lived-in and welcoming.
Even with all the lights on, some corners may remain too dark. Instead of using harsh on-camera flash, try this simple trick: use an external flash (a speedlight) and point it at the ceiling. Bouncing the flash off a neutral-colored ceiling creates a large, soft light source that gently fills in shadows without looking artificial. It’s a game-changer for balancing light evenly across a room.
Transforming Your Photos with Modern Editing Tools
The shutter clicks, the shoot is done, but the work isn't over. In fact, this is where the real magic happens. Post-production is how you turn good photos into great marketing, transforming solid captures into images that make a buyer stop scrolling and pay attention.
This is your chance to polish every shot, correcting minor issues and really making the property’s best features shine. It’s all about creating a bright, appealing, and professional first impression that accurately reflects the home's true feel.
The Foundations of Professional Editing
Before you get into the fancy stuff, every photo needs a few fundamental tweaks. Think of these as the non-negotiables for getting a professional look. They’re the fixes for common problems that pop up on almost every shoot.
First up is lens correction. That wide-angle lens you love for making rooms feel spacious can sometimes create subtle distortion, making walls look curved. Most editing software has built-in profiles to fix this instantly, snapping every line back to where it should be.
Next, you'll dial in the color and exposure. This is all about adjusting the brightness, contrast, and white balance to make the image come alive. You're not trying to create something fake; the goal is a vibrant, true-to-life photo where the wall colors are accurate and the rooms feel just as bright as they do in person.
Finally, always remember to straighten your vertical lines. No matter how carefully you set up your tripod, door frames, windows, and walls can look slightly askew. Correcting this so every vertical is perfectly straight gives the image a feeling of stability and polish. It's a small detail that makes a huge difference.
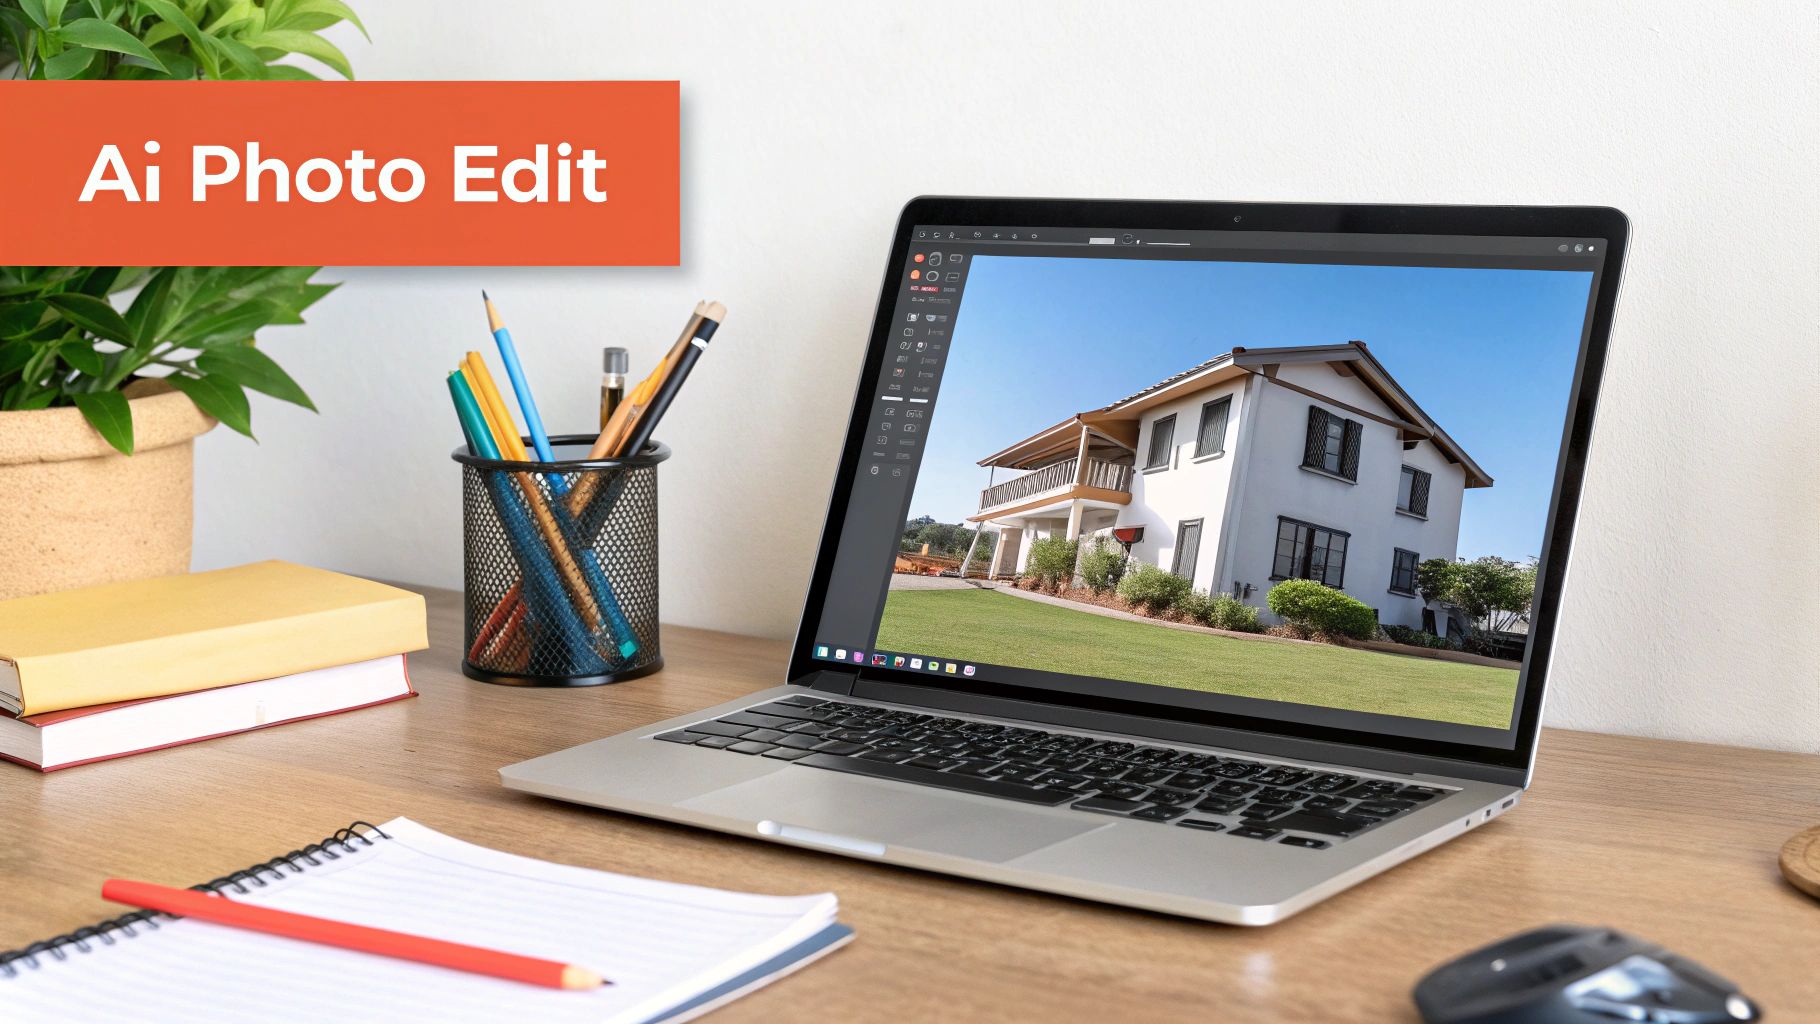
AI: The New Frontier in Real Estate Visuals
While the basics are essential, the real game-changer in photo editing today is artificial intelligence. AI tools are now handling complex edits that used to take hours of painstaking manual work, giving agents incredible power over their visual marketing.
Imagine taking a quick video walkthrough of a property and having an AI assistant like Bounti instantly pull a full set of MLS-ready photos from it. This is a massive time-saver, but it also ensures you've captured every important angle and detail without having to think about it on site.
The most powerful use of AI in real estate photography isn't just about fixing photos—it's about reimagining possibilities. It allows you to sell the potential of a space, not just its current state.
And this technology does so much more than just generate stills. It gives you the power to solve some of the biggest listing challenges with just a click:
- Virtual Staging: Take a cold, empty room and instantly furnish it to feel warm and inviting.
- AI Decluttering: Got a room full of personal items or clutter? Remove it all in seconds.
- Virtual Renovations: Show buyers what that dated kitchen could look like with modern cabinets or new floors.
These aren't futuristic ideas—they're tools you can use right now. We've actually broken down some of the top performers in our guide to the https://bounti.ai/blog/photography/best-ai-photo-editing-software on the market.
A Real-World AI Scenario: The Vacant Listing
Let’s talk about a classic agent headache: the vacant listing. Empty houses often feel sterile and can make it tough for buyers to picture themselves and their furniture in the space. This is where AI editing becomes your secret weapon.
You walk through the empty property and shoot a quick video. Back at your desk, you use an AI tool to generate high-quality photos of every room. Then, with a few clicks, you virtually stage the master bedroom with a king-sized bed, add a sleek dining table to the dining area, and place a comfy-looking sofa in the living room.
Suddenly, that blank canvas feels like a home. You now have a complete set of visuals that show off the property's true potential, helping buyers make an emotional connection before they even step through the door.
This ability to transform spaces is becoming crucial. We've already seen how drone photos can help listings sell up to 68% faster and 3D tours can help them close 31% faster. AI-powered staging and editing are the next wave. Exploring different real estate photo editing software options is key to elevating your images. As these tools become the norm, platforms like Bounti—which can handle everything from stills to decluttering from a single video—are quickly becoming indispensable.
Common Real Estate Photography Questions Answered
Even when you've got a solid workflow dialed in, questions always pop up on-site. It's just part of the game. Let's dig into some of the most common questions I get from agents trying to nail their listing photography.
Think of this as your field guide for clearing those common hurdles, so you can get back to shooting with confidence.
How Many Photos Should I Take for an Average Listing?
This is the big one. Everyone wants a magic number, but it’s really about finding the sweet spot. You need enough photos to tell the home's full story without putting potential buyers to sleep.
For a standard home (think 2,000-3,000 sq. ft.), aim for a tight set of 25 to 35 high-quality photos. This gives you enough runway to cover all the key spaces without overwhelming the viewer.
A good starting point for your shot list looks something like this:
- 2-3 exterior shots: Don't forget the front and back.
- 3-4 living room shots: Capture it from different angles to show the flow.
- 3-4 kitchen shots: Get the overall space, plus a few detail shots.
- 2-3 shots for each bedroom.
- 1-2 shots for each bathroom.
- 1 shot each for other important areas like the laundry room, office, or garage.
The real goal here is quality over quantity. Twenty-five incredible photos are infinitely better than fifty mediocre ones. Always ask yourself: does this shot sell the lifestyle?
Should I Hire a Professional or Do It Myself?
This really boils down to three things: your time, your budget, and how much control you want. Bringing in a pro will cost you anywhere from $170 to over $300 for a standard shoot, but you're buying their experience, gear, and eye. For that million-dollar listing? It's often a no-brainer.
But learning the craft yourself gives you incredible agility. You can shoot on your own schedule, pop back for a reshoot if the weather changes, and keep total creative control. And honestly, with today's cameras and AI editing tools, the quality gap between pro and DIY has never been smaller.
The DIY route is perfect for agents building a system that works for all their listings, not just the luxury ones. It's a skill that pays you back over and over.
Is It Worth Investing in a Drone for Aerial Shots?
For the right property, a drone isn't just worth it—it's essential. Aerial shots are no longer a gimmick; they're a must-have for listings where the story can't be told from the ground.
You should seriously consider a drone if the property has:
- A large lot or significant acreage.
- Beautiful landscaping, a pool, or a killer patio setup.
- A prime location with water or mountain views.
- A brand new roof or other exterior upgrades you want to show off.
The data backs this up. Agents who invest in professional-level visuals see 47% more views and 39% more inquiries, and virtual tours can help a property sell up to 31% faster. As you can see from insights at myphotocareer.com, this is one area where investing pays off, especially with tools that can automatically generate assets from a single video.
How Do I Handle a Dark Room With No Natural Light?
Ah, the dreaded windowless room. Basements, interior bathrooms, and dark hallways can feel like a nightmare, but this is where your tripod becomes your best friend.
First, flip on every single light in the room. Get your camera locked down on the tripod, set your aperture to f/8, and your ISO to 100. Now for the magic: just slow down your shutter speed. Keep slowing it down until your camera’s light meter tells you the exposure is right.
It might feel weird setting a 5, 10, or even 30-second exposure, but trust the process. The tripod will keep everything perfectly crisp and you'll pull in more light than you thought possible.
Ready to transform your real estate marketing workflow? Bounti Labs is the AI assistant that generates stunning MLS-ready photos, compelling property descriptions, and even virtual staging from a single video. Stop waiting on expensive photographers and start creating incredible visuals instantly. Discover how Bounti can help you win more listings today.