Let's be blunt: mediocre real estate photos are costing you money. They're more than a missed opportunity—they're a liability that directly impacts how quickly a home sells and for how much.
If you’re still skimping on high-quality visuals, you're playing a losing game.
The True Cost of "Good Enough" Real Estate Photos
Top agents I know don't see photography as an expense. They see it as a critical investment with a hard, measurable return. They understand that in an online-first market, your photos are the first showing.
You have seconds, maybe less, to grab a buyer's attention before they scroll on to the next property. Fail that test, and you've lost them for good.

This isn’t just a gut feeling; the data consistently proves the financial link between photo quality and sales outcomes. In fact, professionally shot homes don't just look better—they perform better across the board. The difference is staggering when you look at the numbers.
How Quality Real Estate Photos Impact Your Performance
This table breaks down the tangible benefits agents see when they prioritize high-quality property visuals.
| Metric | Performance Uplift | Source |
|---|---|---|
| Days on Market | Sells 32% faster | PR Newswire |
| Sale Price | Earns $3,400 to $11,200 more | Redfin |
| Online Views | 118% more online views | Redfin |
| Perceived Value | 2-5% higher perceived value | Wall Street Journal |
The data speaks for itself. Investing in professional-grade photography isn't just about aesthetics; it's a strategic move that directly translates to faster sales and higher closing prices, which you can explore further in the latest real estate photo statistics.
The question isn't whether you can afford great images. It's whether your business can afford the consequences of not having them.
Your Brand Is Your Listing Portfolio
Beyond any single sale, the quality of your real estate photos shapes your brand. Every listing you market is a billboard for your business.
When you consistently showcase properties with stunning, professional imagery, you send a clear signal to potential sellers: you are a premium agent who invests in getting results.
This perception builds a powerful reputation that delivers real business benefits:
- Win More Listings: Homeowners want an agent whose marketing looks polished and effective. Your portfolio of beautiful photos becomes your best closing tool.
- Attract Serious Buyers: Great photos filter out the casual browsers and attract motivated buyers who are ready to act.
- Justify Your Commission: When you demonstrate a clear marketing strategy that starts with top-tier visuals, your value proposition becomes undeniable.
Imagine two agents competing for the same listing. One shows a portfolio of crisp, bright, inviting homes. The other pulls up a folder of dark, blurry smartphone pictures. Who do you think the seller is hiring?
The Downward Spiral of a Slow Sale
Let's break down the financial bleed. A listing with average photos might sit on the market for 45 days. A beautifully photographed one often sells in 30.
Those extra 15 days aren't just a number. For the seller, that means more carrying costs, more stress, and a growing pressure to accept a lowball offer or make a price reduction just to reignite interest.
By investing a few hundred dollars in excellent photos, you can shrink that sales cycle dramatically. This not only delights your current client but also frees you up to land your next listing faster. The ripple effect on your annual income is huge, turning a small upfront cost into a significant profit driver.
Preparing the Home for Its Best First Impression
Let's be honest: a great real estate photo has less to do with the camera and everything to do with what’s in front of the lens. Your most important job before any shoot is guiding sellers to transform their lived-in house into an aspirational showcase. This isn't about their personal style; it's about creating a clean, inviting canvas where buyers can instantly see their own future.
The mission is simple: get rid of anything that pulls focus from the home's best features. Every family photo, every fridge magnet, every personal knick-knack builds a tiny wall between the buyer and the property. You’re not just documenting a space—you’re marketing a feeling.

The Art of Depersonalizing and Decluttering
Think of it as "hotel-ifying" the home. A great hotel room feels luxurious, spotless, and completely anonymous. It gives guests permission to immediately relax and make the space their own. Your listing photos need to deliver that exact same vibe.
Give your sellers a simple, actionable checklist. The key is to focus on high-impact changes that don't break the bank. You're not trying to hide flaws; you're just making the home’s potential impossible to ignore. For a dose of inspiration, just look at these incredible house staging before and after transformations.
Here’s a practical, room-by-room guide you can pass along:
- Kitchen: The goal is 100% clear countertops. Yes, that means the toaster, the coffee maker, the knife block, and the dish soap all get put away. A single bowl of fresh lemons or a high-end cookbook is all the styling you need.
- Bathrooms: Every personal toiletry has to vanish. No one wants to see a half-used bar of soap. Stage it with plush, folded white towels, a new soap dispenser, and maybe a small, elegant plant.
- Living Room: Hide every single cable and cord. Unplug things if you have to. Fluff the pillows, neatly fold the throw blankets, and clear the coffee table of everything except one or two well-chosen items, like a book or a small vase.
- Bedrooms: The beds need to look like they belong in a luxury hotel—perfectly made with crisp lines. Nightstands should be clear of alarm clocks, charging cords, and water glasses. And don't forget the closets; buyers will look, so make sure they're neat and not bursting at the seams.
Your guiding principle for sellers should be: "If you use it every day, hide it away for the photoshoot." This simple rule drastically improves the quality of your final real estate photos.
Lighting and Final Touches
Once the clutter is gone, it’s all about the light. Open every blind and every curtain. Letting in as much natural light as possible is the single best way to make rooms feel bigger, cleaner, and more welcoming.
Right before the photographer is scheduled to arrive, do one last walkthrough. This is your chance to catch the small details that can derail an otherwise perfect shot.
The Final Pre-Shoot Checklist:
- Turn on every single light. This means lamps, overhead fixtures, and especially under-cabinet lighting. Layered light creates warmth and depth.
- Turn off all ceiling fans. A spinning fan just creates an ugly motion blur in photos. It looks amateur.
- Make sure all windows are spotless. Streaks and smudges are glaringly obvious in high-resolution photos and can make a bright space feel dingy.
- Hide all trash cans. This goes for the small ones in the bathrooms and the main one in the kitchen.
- Remove pets and all their gear. Food bowls, beds, and toys need to be out of sight to present a truly clean slate.
This level of prep might seem a bit obsessive, but it's exactly what separates forgettable real estate photos from images that make buyers stop scrolling. It shows sellers your commitment to getting them the best price and ensures the home makes an unforgettable first impression.
Essential Techniques for Capturing Flawless Shots
With the home prepped and looking its best, it's time to talk about the camera work. You don’t need a decade of photography experience, but a few core principles will absolutely transform your real estate photos. It’s about shifting your mindset—learning to see a room not just as a space, but as a composition waiting to be captured.
The right techniques pull a buyer into the photo, making the property feel spacious, bright, and like a place they could call home. These aren't complicated tricks; they're simple adjustments that turn a decent photo into one that stops the scroll.
Perfecting Your Perspective and Composition
The first and most important rule of interior photography: use a wide-angle lens. This is non-negotiable. It’s what gives you that open, airy feeling that buyers love. But be careful. Going too wide creates a distorted, "fish-eye" look that makes walls and furniture seem curved. The sweet spot for a full-frame camera is a focal length between 16-24mm.
Next, let's talk about height. So many agents shoot from their own eye level, looking down on the furniture and accidentally shrinking the room. Don't do it.
Get low. Your camera should be at chest or doorknob level, roughly 40-48 inches from the floor. This perspective grounds the image, makes the space feel balanced, and puts the viewer right there in the room.
Finally, mind your lines. Every vertical line in your shot—door frames, window edges, the corners of the room—must be perfectly straight. A tripod isn't just for stability; it's your best tool for meticulously leveling every single photo. Crooked lines are an instant giveaway of an amateur shot and can be a major turn-off.
Mastering Interior and Exterior Lighting
Lighting isn't just part of photography; it is photography. It creates the mood, highlights the home's best assets, and can single-handedly make or break your entire gallery. Your goal is simple: bright, evenly lit images without any jarring shadows or blown-out, overly bright spots.
For interiors, always start with natural light. Throw open every blind and pull back every curtain. If you can, plan your shoot for a time when the sun isn't blasting directly through the windows, which causes harsh glare. Believe it or not, a slightly overcast day is your best friend—it provides soft, diffused light that's incredibly flattering.
When you're dealing with a room that has both brilliant windows and dark corners, the pros turn to High Dynamic Range (HDR). This technique involves taking several shots at different exposures (dark, medium, and bright) and blending them into one perfectly lit photo. To see exactly how it’s done, check out our guide on HDR photography in real estate.
For the outside of the home, timing is everything. There’s a reason photographers are obsessed with the "golden hour." It’s that first hour after sunrise and the last hour before sunset when the light is soft, warm, and casts long, beautiful shadows that add depth. A home shot during golden hour just feels more magical.
Taking to the Skies with Drone Photography
While interior shots sell the lifestyle, aerial shots sell the context and the dream. Drone photography has quickly gone from a nice-to-have luxury to an absolute must-have for showcasing a property's full story. There's simply no other way to capture:
- The entire property and lot size in one powerful image.
- Key neighborhood features like proximity to parks, water, or local hot spots.
- The home's relationship to its surroundings, showing off a private backyard or stunning view.
- Unique rooflines and architectural details you can't see from the ground.
The impact is staggering. Industry data reveals that listings with drone photography sell 68% faster and see an 83% jump in online engagement. In a crowded market, those aerial views are the "wow" factor that converts online interest into in-person showings. You can see more on how aerial shots are transforming real estate marketing.
This is especially true for properties with a lot of land, waterfront access, or incredible views. A photo from the street just can't communicate that value. An aerial shot does it instantly. Hiring a licensed and insured drone pilot is a small investment that paints a complete picture for buyers and delivers a massive return.
Bring Your Listings to Life with AI Photo Tools
Getting the shot is just the start. The real magic in creating real estate photos that stop the scroll happens in post-production. But the old way of editing—spending hours in complicated software—is a massive time sink.
We've all been there, manually adjusting brightness, fighting with color balance, and painstakingly straightening every vertical line to avoid that dreaded amateur look. These edits are essential, but they don't have to be a grind. This is where AI tools completely change the game for agents and teams.
More Than Just Basic Edits
Today’s market demands more than just a clean photo. This is where AI editing tools come in, moving past simple fixes to offer capabilities that used to require an expensive professional and days of waiting. They can analyze an image and handle complex jobs in seconds, giving you back your time to actually sell the property.
What if you could turn a quick video walkthrough into a full set of MLS-ready photos without ever opening a traditional editing program? That's not a far-off idea; it’s happening right now with platforms like Bounti. You just record a video, and the AI automatically pulls the best frames, applies pro-level edits, and builds a gallery for you.
The infographic below shows the essential shots that make up a strong real estate photo gallery, all of which can be dramatically improved with AI.
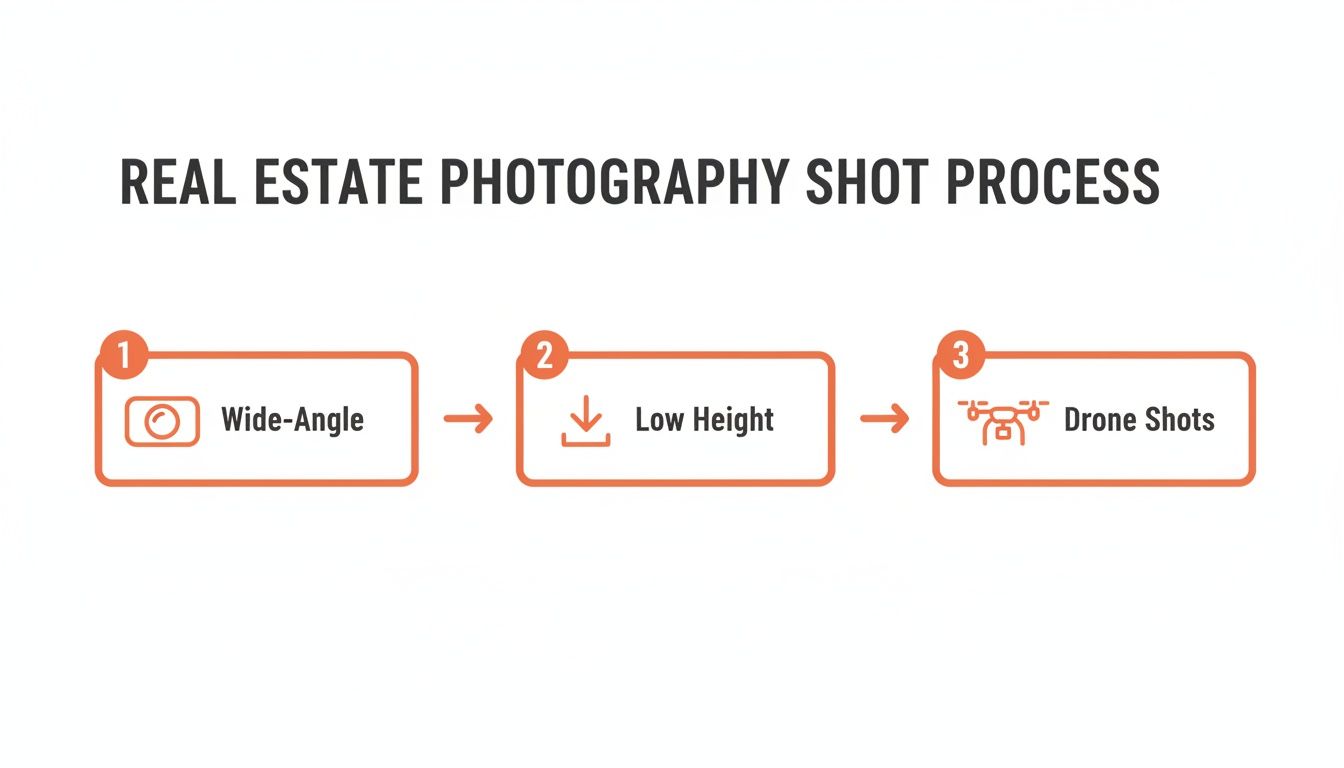
This process highlights the core compositions—wide interior shots, compelling low-angle perspectives, and sweeping drone views—that build a powerful visual story for any listing.
AI-Powered Decluttering and Virtual Staging
Let's be honest: asking a seller to remove all their personal items is one of the most awkward conversations in real estate. It's their home, filled with their life. AI offers a brilliant workaround: digital decluttering.
Instead of negotiating over moving heavy furniture or packing up family heirlooms, you can just take the photos. AI tools can then digitally erase the clutter—from kids' toys on the floor to stacks of mail on the counter—and deliver a clean, buyer-friendly image in minutes.
The ability to instantly show a property's full potential, unburdened by clutter, is a massive competitive advantage. It allows buyers to visualize themselves in the space without distraction.
Virtual staging takes it a step further. An empty room can feel sterile and make it hard for buyers to judge the size and possibilities of the space. AI-powered virtual staging solves this by adding stylish, modern furniture that fits the home's character.
- For Vacant Properties: Turn an empty living room into a cozy, furnished space that feels like home.
- For Outdated Homes: Swap a seller's dated furniture for contemporary pieces that appeal to today's buyers.
- For Awkward Spaces: Show how that strange corner could become a perfect home office or a quiet reading nook.
To see how these features fit into a larger workflow, checking out some of the Best AI Photo Editing Software Platforms can offer a wider view of the market.
From Simple Fixes to Full-Scale Renovations
The most powerful AI tools are now capable of virtual renovations, which is a total game-changer for properties that have great "bones" but need some work. Instead of telling buyers to "use their imagination," you can actually show them the potential.
Take a kitchen with dated oak cabinets and formica countertops. With a few clicks, you can generate an image of that same kitchen with crisp white shaker cabinets, a marble island, and new appliances. This helps buyers look past the current state and see the property's true value. We take a deeper dive into these options in our review of the best AI photo editing software.
By working AI into your process for creating real estate photos, you're not just saving a ton of time. You're creating more value for your clients and giving buyers a reason to get excited.
Optimizing and Publishing Photos for Maximum Reach
Taking stunning real estate photos is only half the job. You can have a folder full of gorgeous, perfectly edited images, but if you don't get the delivery right, you’ve wasted your time. It’s not about just uploading them—it's about a strategy that maximizes speed, story, and reach.
A slow-loading website is a lead killer. We all know it. Buyers make snap judgments online, and a few seconds of delay is all it takes for them to hit the back button. Before a single image hits the MLS or your website, you have to resize it for the web.
Preparing Your Photos for the MLS and Web
Most cameras, even smartphones, produce massive files. We're talking 5-20 MB each. Uploading those directly will absolutely cripple your page load times. The trick is to shrink the file size without any noticeable drop in quality.
For nearly every MLS system and website, your target should be keeping each image under 500 KB. You can nail this with free online tools or the "Export for Web" feature built into most photo editors.
Key Image Specifications:
- Resolution: Aim for a width between 1920 to 2560 pixels. This looks crisp and professional on modern displays without creating a bloated file.
- File Format: Always save as JPEG. It’s the industry standard for a reason, offering the best mix of quality and compression for photos.
- Quality Setting: When you export, a quality setting of 70-80% is the sweet spot. You'll be hard-pressed to see the difference, but the file size will shrink dramatically.
Getting these technical details right creates a seamless experience for buyers. It keeps them focused on the listing, not waiting for it to load.
Don’t let your great photography go to waste on a slow website. A quick resize is the final polish that ensures your images get seen. It's the digital equivalent of making sure the front door is unlocked for an open house.
Sequencing Your Photos to Tell a Story
Your photo gallery can't be just a random dump of rooms. It needs to tell a story, guiding buyers through the property as if you were giving them a personal tour. The order of your real estate photos is everything.
Think like a director. Your first photo—the "hero shot"—has to land a punch. It's almost always the best exterior shot, maybe a twilight photo that feels warm and immediately inviting.
From there, walk them through the house logically:
- The Grand Entrance: Start with that killer front exterior.
- Main Living Areas: Move inside to the entryway, then the living room, dining room, and any family rooms. Show them the heart of the home first.
- The Kitchen: This is a huge selling point, so it comes right after the main living spaces.
- Primary Suite: Next up, the owner's retreat—the primary bedroom and its ensuite bathroom. This is another make-or-break space.
- Secondary Rooms: Now you can show the other bedrooms, bathrooms, home office, or playroom.
- Outdoor Living: Finish strong with the backyard, patio, deck, or pool. End the tour with a final "wow" moment that leaves a lasting impression.
And when you want to take those exterior shots to the next level, a Real Estate Drone Photography Guide Property Marketing can offer some incredible insights for making a property truly stand out.
Extending Your Reach Beyond the MLS
The MLS is just the beginning. To get real exposure for your listing—and your brand—you need to put those visual assets to work across every channel. This creates a marketing bubble that surrounds potential buyers wherever they scroll.
Whip up a quick video slideshow of your best shots for Instagram Reels and TikTok. Throw a trending audio clip on it to get the algorithm's attention. Post a carousel of your top 5-10 images on Instagram and Facebook with a caption that calls out key features and your open house schedule.
Finally, embed these images in your email newsletters. An email with a stunning hero shot has a much higher chance of getting opened and clicked than a wall of text. By using your high-quality visuals everywhere, you reinforce your brand as an agent who invests in top-tier marketing.
Your Real Estate Photo Questions, Answered
Let's be honest, the same questions about listing photos pop up again and again. Whether you're a seasoned agent or just starting out, navigating the world of property photography can feel like a moving target.
This is your quick-reference guide. We're cutting through the noise to give you straight answers on everything from pricing and photo counts to the age-old "DIY vs. Pro" debate.
How Much Should Real Estate Photos Cost?
It's the first question on every agent's mind, and the honest answer is: it depends. Think of professional photography as an investment, where the cost is shaped by the photographer's experience, the property's size, and your local market.
For a standard home, you can expect a basic shoot to land somewhere between $170 and $300. This usually gets you a solid package of 10-25 professionally edited, MLS-ready images.
But remember, pricing is local. A shoot in a hot market like Los Angeles might run you about $318, while the same job in Phoenix could be closer to $208. You're not just paying for someone to click a button; you're paying for their gear, their editing time, and most importantly, their eye for what sells.
How Many Photos Do I Need for a Listing?
More isn't always better. The goal is to tell a compelling story, not to drown potential buyers in a sea of repetitive images.
The sweet spot for most listings is 25-35 high-quality photos. This gives you enough runway to show off every key feature without causing viewer fatigue.
Think of your gallery as a guided tour. A logical flow is crucial:
- The "Hero Shot": Always lead with the absolute best exterior photo.
- Main Living Areas: Walk them through the living room, dining room, and kitchen.
- Primary Suite: Give this space extra attention with several shots of the bedroom and bathroom.
- Other Rooms: Don't forget secondary bedrooms, bathrooms, offices, or bonus spaces.
- Outdoor Spaces: End the tour with the backyard, patio, or any unique views.
A well-curated gallery of 30 photos that walks a buyer through the home is far more powerful than 50 random, unorganized images. Quality and storytelling always beat quantity.
Should I Hire a Pro or Do It Myself?
This one comes down to your skills, your budget, and the value of the listing. For high-end properties, hiring a pro is non-negotiable. It’s a core part of a premium marketing strategy, and the ROI from a faster sale at a higher price almost always makes it a no-brainer.
If your budget is tight or you're just getting your feet wet, learning to take good photos yourself is a fantastic skill. A modern smartphone, combined with the techniques in this guide, can produce surprisingly solid results—especially when you lean on AI editing tools to clean things up.
But here's the real question: what is your time worth? Every hour you spend shooting and editing is an hour you’re not spending on client service or lead gen. For most busy agents, outsourcing photography is simply the most efficient path. A pro brings the right gear, a trained eye, and delivers consistent, high-quality results, every single time.
Bounti is your AI assistant for creating stunning visuals that win clients and close deals. Turn a simple video into a full set of marketing materials—including MLS-ready photos, virtual staging, and property descriptions—in just minutes. See how Bounti can transform your listings today.