A lot of agents still treat staging photos like the polish step at the end of the listing process. That's backwards. The photos are often the first showing, the first objection handler, and the first pricing argument all at once.
Home staging photography works when you stop separating the job into silos. The furniture edit, the cleaning pass, the camera angle, the window pull, the color correction, the virtual decluttering, and the disclosure decision all belong to one system. If any one part fails, the listing feels weaker than it should.
The agents who win consistently understand something simple. Buyers don't reward effort. They respond to clarity. A room either looks spacious, clean, and easy to imagine living in, or it doesn't. Great home staging photography creates that clarity before anyone books a showing.
Why Home Staging Photography Is Your Best Investment
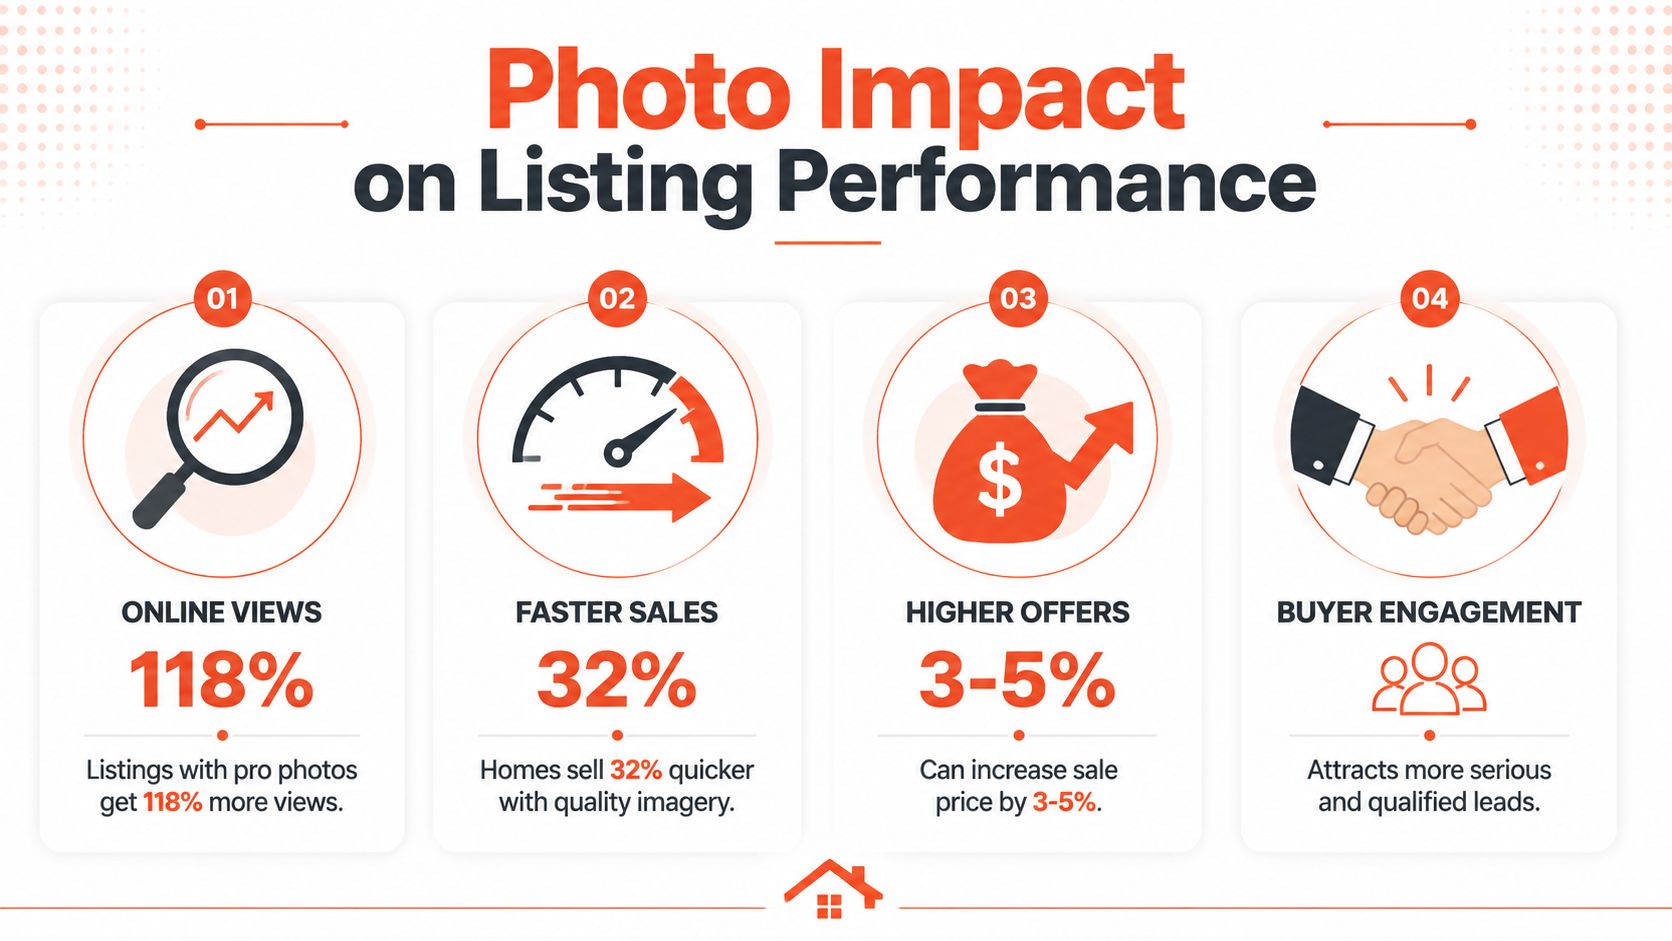
One widely cited NAR-backed statistic says staged homes sell 88% faster and for 20% more than non-staged homes, according to virtual staging statistics compiled here. That's the clearest reason to stop treating home staging photography as an optional marketing extra.
The same source says virtual staging can cut costs by up to 97%, with typical prices of $24 to $99 per photo. Those numbers matter because they change the conversation with sellers. You no longer have to choose between a full physical staging project and weak listing photos. You can build a smarter workflow that starts with physical preparation, captures the property correctly, and uses selective digital enhancement where it helps.
The listing photo is now the sales floor
The old model was simple. Clean the home, hire a photographer, upload the gallery, hope for traffic. That still works on great homes in hot markets. It underperforms everywhere else.
Today, home staging photography is a conversion system. It starts before the shoot, with edits that make rooms read larger on camera than they do in person. It continues during the shoot, where composition and light shape the buyer's first emotional reaction. It finishes in post-production, where basic corrections and selective virtual staging turn an inconsistent gallery into a coherent marketing asset.
That integrated approach is why staged visual presentation keeps outperforming plain documentation. Sellers don't pay for photos because they want a pretty slideshow. They pay because the images need to create urgency, support value, and reduce friction.
Practical rule: If the photo set doesn't help justify the asking price, it isn't doing its job.
Strong visuals start before the camera comes out
Most photo problems aren't camera problems. They're prep problems. A room with too much furniture, mixed-color bulbs, visible cords, pet items, countertop clutter, and personal memorabilia won't be saved by editing.
That's why I push sellers to improve your home for selling before we ever talk about lenses or presets. The basics still matter. The modern difference is that you're preparing for both in-person impressions and image performance.
If you want to see how dramatic that transformation can be, this set of house staging before and after examples shows exactly why visual planning has become part of pricing strategy, not just presentation.
The Pre-Shoot Playbook for Flawless Photos
The best photographers I've worked with all want the same thing before they arrive. A house that's already been edited. Not decorated more. Edited.
That means every room has one job. Show scale, light, and livability. If an item doesn't help with one of those three, remove it.
The non-negotiables
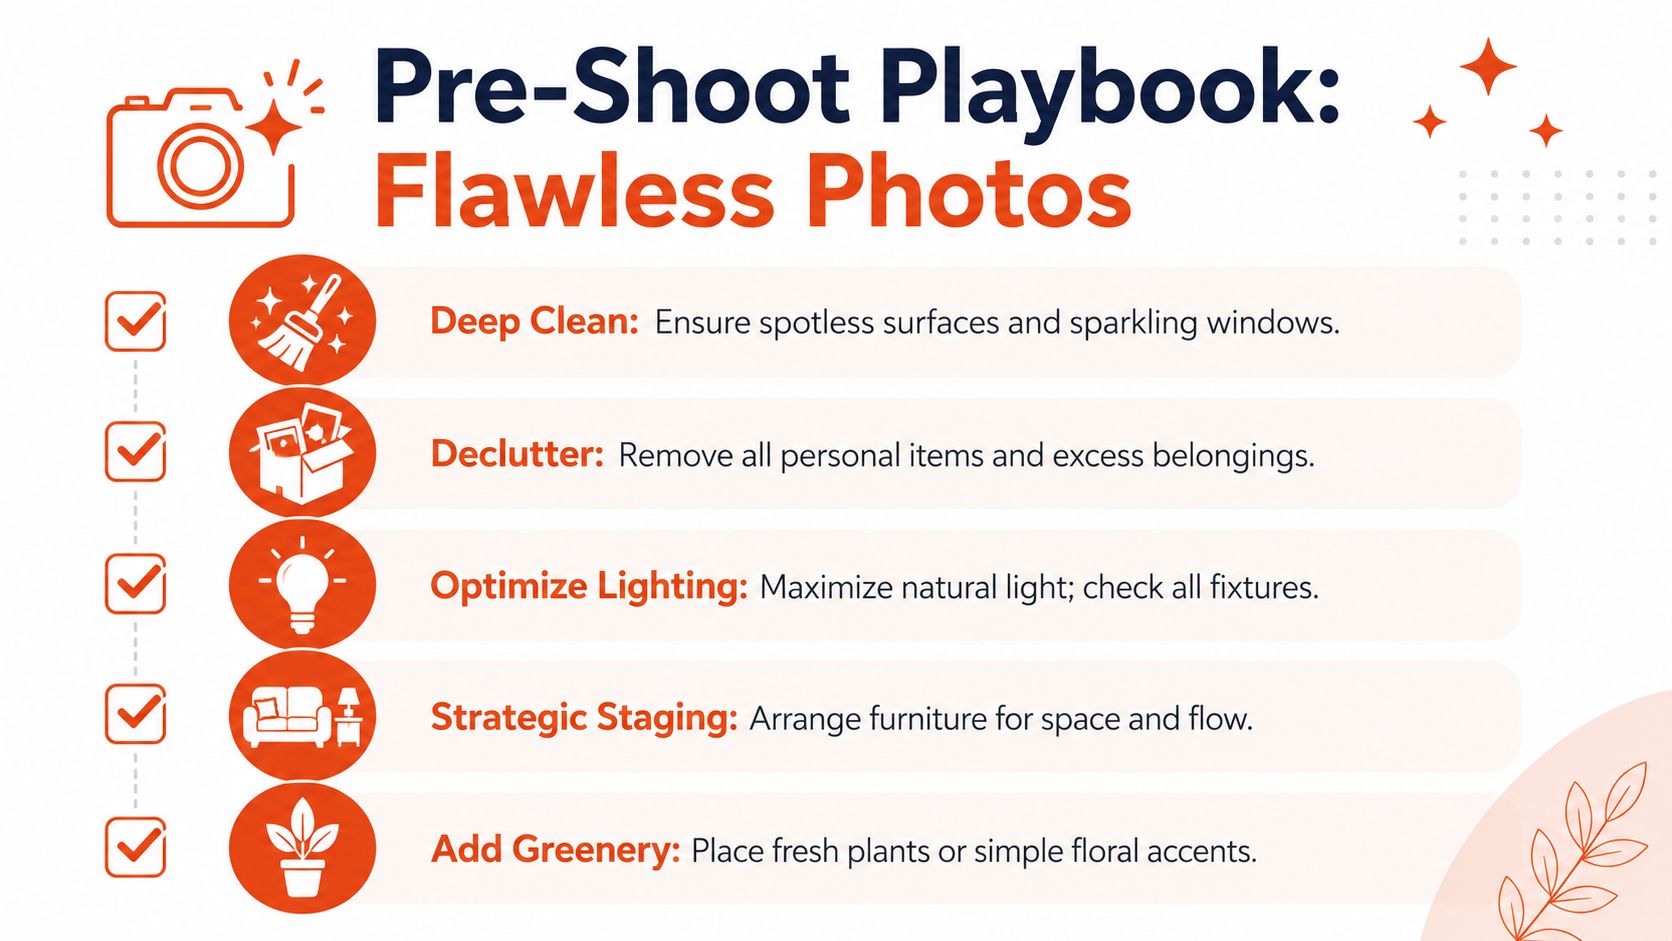
Use this checklist before every shoot:
- Deep clean first: Floors, mirrors, faucets, glass, stainless steel, shower doors, and windows need to look immaculate on camera. Dust that disappears in person can show up fast in high-resolution images.
- Declutter aggressively: Clear surfaces until each room reads in a single glance. Buyers should notice the space, not the owner's routines.
- Fix lighting consistency: Open window coverings, replace failed bulbs, and make sure the light color feels consistent from room to room.
- Stage for flow: Pull furniture slightly away from walls when it improves depth. Remove pieces that interrupt walkways or make a room feel tight.
- Add restrained warmth: A plant, a simple bowl, neatly folded white towels, or one clean textile can help. Ten decorative objects can kill the shot.
Room by room priorities
A generic “declutter and depersonalize” memo isn't enough. Sellers need specifics.
| Room | What to remove | What to leave |
|---|---|---|
| Living room | Remote piles, pet beds, oversized side tables, excess chairs | A balanced seating layout, one or two accents |
| Kitchen | Small appliances, magnets, soaps, drying racks, paper stacks | One intentional focal item if the counters feel too bare |
| Primary bedroom | Laundry hampers, busy bedding, personal photos, charging cables | Neutral bedding and symmetrical nightstands if possible |
| Bathroom | Toiletries, bath mats that bunch up, trash cans, razors | Fresh towels and minimal countertop styling |
| Exterior | Bins, hoses, cars in prime view, dead plants | Clean entry, visible path, simple seasonal touch |
What sellers usually get wrong
The biggest mistake is thinking staging means adding more items. For photography, less usually wins. A room can feel pleasant in person and still photograph badly because the eye has no resting point.
A close second is leaving “temporary clutter” in place. That means mail on the island, backpacks by the stairs, a dog crate in the corner, shoes by the entry, or an office chair shoved into a bedroom. Sellers stop seeing those things. The camera doesn't.
A photo-ready house should feel slightly less lived-in than a show-ready house.
The final walk-through before the photographer arrives
Do a quick pass with your phone camera, not your eyes. Stand in the doorway of each room and ask three questions:
- Is there anything bright, personal, or messy pulling attention away?
- Does the room feel bigger or smaller than it should?
- Would a buyer understand the purpose of this room immediately?
If the answer to any of those is no, fix it before the pro arrives. Home staging photography gets much easier when the property reads clearly from the threshold.
Directing the Shoot A Room-by-Room Shot List
An industry source reports that 95% of buyers start with the photo, buyers spend about 2 seconds deciding whether to keep looking, and if they stay, they spend roughly 20 seconds on the first photo, as described in this overview of why staging and photography matter. That's why the shoot can't be passive. Someone needs to direct it.
If you're the agent, your job isn't to fiddle with camera buttons unless you're also the photographer. Your job is to protect the story of the listing. Every image should answer one of three buyer questions. How big is it? How does it flow? Why is it worth seeing in person?
The three-shot rule for every important space

For the rooms that sell the home, I want at least these three views:
- The wide anchor shot: Usually from a corner or doorway, showing the room's size and layout.
- The feature shot: A fireplace, island, bay window, built-in shelving, statement vanity, or another selling detail.
- The connection shot: A view that shows how one area leads into another, especially kitchen to dining, living to outdoor space, or bedroom to bath.
This framework keeps a gallery from feeling repetitive. It also stops photographers from delivering ten angles of the same room while missing the one shot that proves the floor plan works.
Room-specific priorities
The shot list should change with the property, but some priorities stay consistent.
Living room
Lead with the image that shows breadth and seating logic. If the room opens to another area, capture that relationship. If there's a fireplace or view, make sure it gets one dedicated frame.
Kitchen
Get one wide shot that establishes cabinet run, island, and appliance placement. Then look for a second angle that shows prep space or the kitchen opening into the main living area.
Primary bedroom
Keep lines clean and include enough floor to make the room feel breathable. If there's a strong ensuite or closet connection, capture that transition.
Bathrooms
Go wider than instinct tells you, but stay honest. Crooked verticals and exaggerated angles make bathrooms look sloppy or deceptive fast.
Exterior
Front elevation first. Then one angle that gives depth. If there's meaningful outdoor living, treat it like an interior room, not an afterthought.
Don't let the gallery become a pile of competent photos. It needs a first image, a rhythm, and a reason to keep clicking.
Composition rules that save a shoot
You don't need photography school to direct a better listing shoot. You need a few standards:
- Keep vertical lines straight: Door frames and walls that lean make the whole home feel off.
- Shoot from useful corners: Corners usually reveal dimensions better than flat wall shots.
- Hide awkward cutoffs: Don't clip furniture strangely or crop through fixtures unless the detail is intentional.
- Use leading lines: Hallways, counters, stair rails, and flooring patterns can pull the eye through the frame.
- Watch reflections: Mirrors, glossy appliances, and TV screens can expose clutter or crew.
A good shoot doesn't just document rooms. It edits buyer attention.
Mastering Light and Camera Settings for Real Estate
Most bad real estate photos have one of two problems. The room is dark, or the room is bright in all the wrong places. Both problems make buyers hesitate because they create uncertainty about the home's actual condition.
Light is what gives home staging photography its marketable look. The goal isn't drama. It's believable brightness, controlled contrast, and enough detail that buyers can read the room without effort.
Light the room people want to buy
Natural light usually gives the best starting point. Open blinds, pull curtains cleanly aside, and schedule the shoot when the home has the most even daylight rather than the harshest direct sun.
Then use the home's fixtures carefully. Turn on lamps when they add warmth or visual balance. Be cautious with harsh ceiling lights that create hot spots, heavy shadows, or strange color casts. In office nooks and flex spaces, good task lighting matters too. This guide to lighting for productive home offices is useful because those same principles often help a small workspace read better in listing photos.
Camera settings that matter most
Agents don't need to become technicians, but they should know what to ask for and what to look for.
- Use a tripod: It keeps images sharp and lets the photographer work with lower ISO settings, which usually means cleaner files.
- Control ISO: Higher ISO can introduce grain and make walls or cabinets look rougher than they are.
- Use a wide lens carefully: Wide helps show space, but too wide can stretch edges and make rooms look distorted.
- Bracket exposures when needed: Bright windows and darker interiors often need multiple exposures to hold detail in both areas.
- Correct lens distortion: Straight walls and accurate proportions build trust.
If you want a practical reference for this editing style, this overview of HDR photography for real estate is worth reviewing before your next shoot.
What good technical choices actually do
A lower f-number can help create subtle depth in detail shots, but for most room photos you want enough of the space in focus that buyers can read the full scene. Sharpness should support comprehension, not artistic blur.
The objective is consistency. Windows shouldn't blow out to pure white unless there's no meaningful view. Cabinet colors should match from one photo to the next. White walls should look white, not blue in one room and yellow in another.
Technical quality matters because it reduces doubt. When buyers trust the images, they spend more time engaging with the listing instead of questioning it.
The Modern Post-Processing Workflow from Raw to AI-Ready
Post-processing is where average property photos become listing assets. It's also where agents can create serious problems if they confuse enhancement with deception.
The baseline edit is still traditional. Correct white balance, fix verticals, recover detail where possible, balance exposure, clean up minor distractions, and export for the channels you're using. None of that is controversial. It's quality control.

What belongs in a standard edit
A clean post-production workflow usually includes:
- Color correction: Make paint, flooring, cabinetry, and countertops look like themselves.
- Exposure balancing: Hold interior detail without making the image look flat or fake.
- Perspective correction: Straighten walls, windows, and door frames.
- Lens cleanup: Reduce distortion and edge stretching from wide-angle capture.
- Minor visual cleanup: Remove sensor dust, tighten obvious temporary distractions, and refine contrast.
Those steps help the listing present accurately. They don't alter the property itself.
Where AI changes the workflow
Progress in this area has been swift. A room no longer has to be abandoned because it was vacant, under-furnished, or imperfectly styled on shoot day. AI tools can now declutter surfaces, restyle dated furniture, virtually stage empty rooms, and generate polished marketing visuals from leaner source material.
That matters most in real-world listing conditions. The seller may refuse a full cleanout. The tenant may still be in place. The home may be empty and cold. You still need marketable images.
Done well, AI gives the agent another lane. Instead of postponing the listing or accepting weak visuals, you capture the property as cleanly as possible and improve presentation in post.
Here's a look at how that kind of transformation can fit into a fast production workflow:
For a broader look at what these tools can handle, this guide to best AI photo editing software is a useful starting point.
The line you shouldn't cross
One underserved issue in home staging photography is how far image enhancement can go before it becomes misleading. As noted in this discussion of staging photography and misrepresentation, many guides mention honesty in general terms but don't define practical boundaries for virtual decluttering, AI restyling, or disclosure decisions.
The simplest standard is this. Improve presentation, don't alter material facts.
A few examples make the distinction clearer:
| Usually acceptable | Usually risky |
|---|---|
| Correcting color and exposure | Removing permanent damage or defects |
| Virtually staging an empty room | Deleting power lines, neighboring structures, or fixed site issues |
| Reducing removable clutter | Changing room dimensions or architectural elements |
| Replacing temporary lawn dullness with cleaner presentation | Creating features that don't exist |
If the edit changes how a reasonable buyer would understand the property, you're no longer polishing. You're misrepresenting. That's where disclosure becomes a real consideration, especially with virtual staging and AI restyling.
The safest ethical test is simple. If a buyer walked in and felt the photo promised a different property, the edit went too far.
Measuring What Matters Connecting Photos to Listing Performance
Listings live or die in the first scroll. If the photography package does not earn clicks, saves, and showings, the rest of the marketing plan has to work harder than it should.
That is why I treat staging, shooting, editing, and post-production as one performance system. The photos are not the final product. Buyer response is.
The metrics worth watching
Skip the bloated dashboard. Review the same signals on every listing so patterns are easy to spot.
Track these first:
- Clicks into the listing: The cover photo and first few gallery images either earn attention or lose it.
- Save or favorite rate: Saved listings stay in the consideration set. That usually means the imagery gave buyers a reason to come back.
- Inquiry quality: Strong visuals tend to produce clearer questions, more serious showing requests, and fewer dead-end messages.
- Showing activity in the first few days: Good photography usually shows up here fast, especially on fresh inventory.
- Price resistance: Watch buyer feedback. If the home looks well presented and accurately positioned, you hear fewer immediate objections about value.
One metric on its own can mislead. High clicks with weak saves often means the lead image worked but the full gallery did not. Plenty of saves with low showing activity can point to a price issue, a location issue, or photos that looked stronger online than the home felt in person. That trade-off matters. Good marketers do not judge the shoot by one number.
Build proof sellers can understand
Agents who win more listings usually show evidence, not opinions.
Create a simple performance file for each property. Include an unstaged or prepped phone photo, the final marketing image, and a short note on what changed in the workflow. Then add the business result. More showing requests. Better buyer feedback. Faster traction than similar listings with weaker presentation. Sellers understand that immediately because they can see the chain from physical prep to final image to market response.
This also helps with budget conversations. Sellers are far more willing to approve staging, twilight work, detail shots, or selective AI enhancements when you can explain what each step is supposed to improve.
Review the full workflow after launch
The best teams do a post-mortem on every listing, even the ones that sell fast.
Ask blunt questions:
- Which image earned the cover spot, and did it pull traffic?
- Which room looked weaker online than it did in person?
- Did the gallery tell a clear story, or did it feel uneven from room to room?
- Did any AI edits save time without changing material facts?
- Did any edit get close enough to misrepresentation that disclosure should have been considered?
- What would have improved results more: better prep, a different shooting angle, or different post-processing choices?
That last question is where teams get sharper. Sometimes the problem was bad staging. Sometimes it was flat light. Sometimes the shoot was solid and the edit package was too heavy, which can hurt trust when buyers arrive. AI speeds up decluttering, sky replacement, restyling, and image selection, but speed only helps if the final gallery still matches the property a buyer walks into.
Home staging photography earns its keep when you can trace a straight line from preparation to presentation to performance.
Bounti Labs helps agents turn one video walkthrough into MLS-ready photos, property descriptions, and AI-powered staging, decluttering, restyling, or renovation visuals. If you want a faster way to produce stronger listing media without depending on slow manual workflows, take a look at Bounti Labs.