A lot of real estate teams reach the same point with immersive media. They have photos, video, maybe a floor plan, and they know a VR tour could help a buyer understand the space faster. What they don't have is a practical build path.
Most programming for vr advice is written for game developers. It assumes you're building combat systems, enemy AI, or open-world traversal. A property tour is different. You need a fast workflow, clean navigation, realistic presentation, and a final build that buyers can access without friction.
The shortest path to a live listing isn't the most technically impressive one. It's the one that gets your property assets into the right engine, keeps the experience comfortable, and fits your sales process.
Choosing Your Path to Immersive Listings
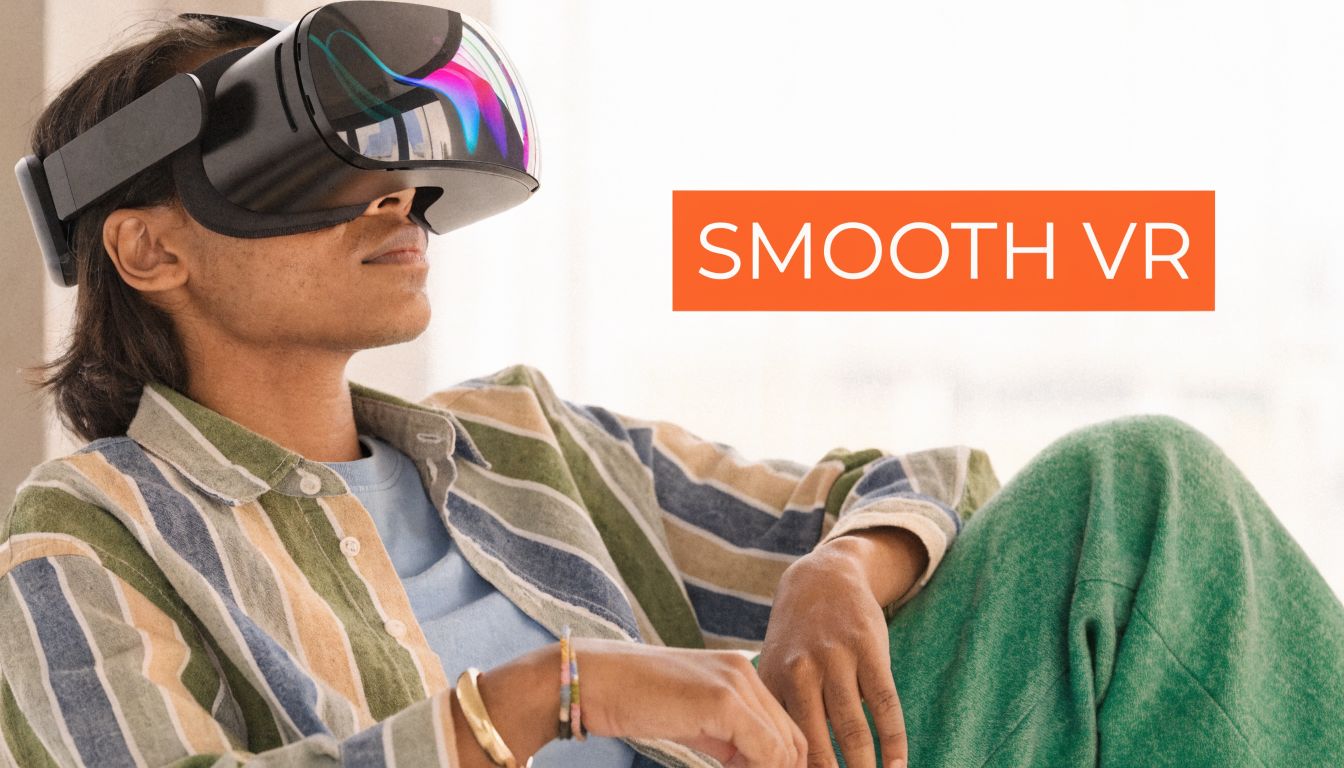
A VR property tour works when it helps a buyer decide. That's the true benchmark. PwC found that learners trained in VR were up to 275% more confident to act on what they learned after training, and for real estate that translates directly to buyer confidence after an immersive tour compared with just viewing photos.
That confidence matters more than novelty. Buyers don't care that your scene runs in an advanced engine. They care that they can judge room flow, ceiling height, kitchen adjacency, window placement, and whether a home feels right.
The platform choice that actually matters
Developers frequently choose between Unity, Unreal Engine, and WebXR. There's also a fourth path: skip custom code and use a managed tour platform. That's valid if speed matters more than custom interaction.
If your team already uses tools to organize and track real estate listings, think about VR the same way. It should fit the operating system of your brokerage, not become a side project nobody maintains.
| Platform | Best For | Learning Curve | Visual Fidelity | Deployment |
|---|---|---|---|---|
| Unity | Fast production, cross-device property tours, teams that need iteration speed | Moderate | Strong | Headsets, desktop, web-connected workflows |
| Unreal Engine | Premium architectural visualization, higher-end interactive presentations | Higher | Excellent | PC VR, premium demos, custom kiosk builds |
| WebXR | Browser-based access, low-friction sharing, marketing pages | Lower to moderate | Good when scoped carefully | Browser delivery without app install |
What works for real estate
Unity is usually the best starting point for programming for vr in real estate. It gives you fast iteration, a large XR ecosystem, and fewer headaches when you need to support multiple device targets.
Unreal makes sense when the listing itself is the product. New development launches, luxury pre-sales, and design-center presentations benefit from stronger out-of-the-box rendering, especially when you have a technical artist on hand.
WebXR wins when access is everything. If you need a client to open a link from a listing page or email and start exploring without installing anything, browser delivery changes the equation.
Practical rule: Pick the platform based on distribution first, visuals second, and engine preference third.
A lot of agents overbuy on visual ambition and underbuy on accessibility. If the tour only runs on a tethered headset in your office, it's not a listing asset. It's a demo.
If you're working from AI-generated listing media, a studio workflow like Bounti Studio Experience can help upstream by producing cleaner source assets before anything reaches the engine. That matters because bad inputs create expensive cleanup later.
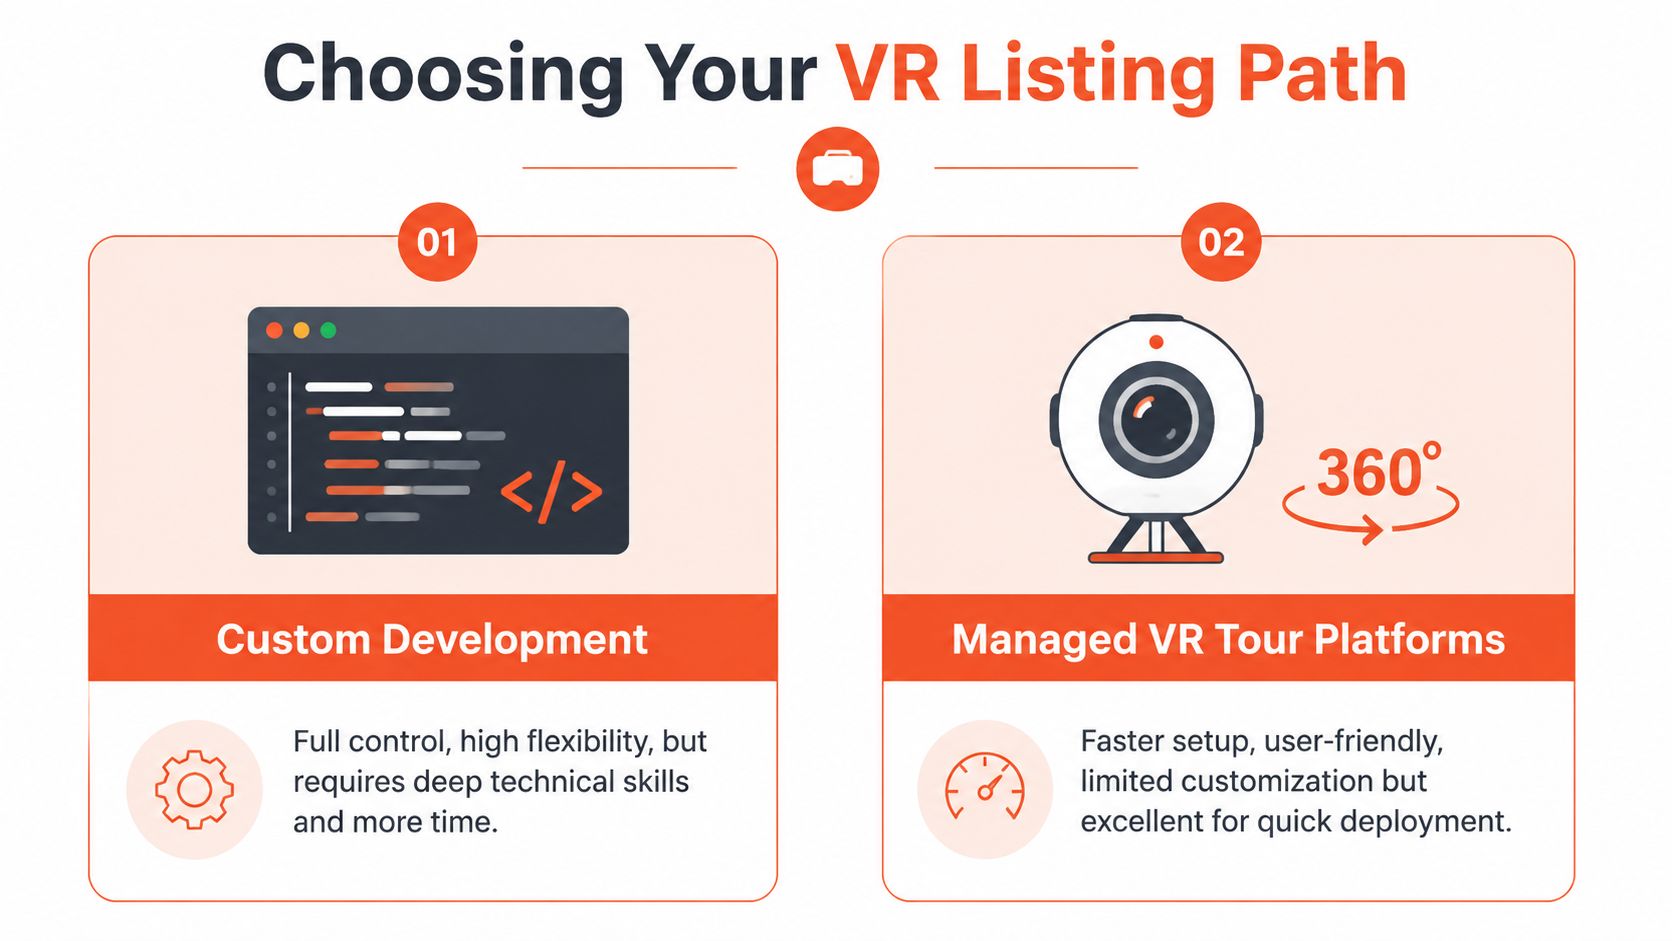
Custom build or managed platform
Custom development pays off when you need:
- Branded interaction design that matches a brokerage or development project
- Data layers such as room labels, finish callouts, or floorplan-linked navigation
- Reusable code across multiple listings, not one-off tours
- Device flexibility for headset demos, web previews, and in-office presentations
A managed platform is better when:
- Your listing cycle is short and speed outranks customization
- Your team doesn't have a developer
- The tour is mostly panoramic media with simple hotspots
- You need predictable publishing workflows
The mistake is treating these as competing philosophies. They're production choices. For most real estate teams, the right answer is simple: start with the fastest system that can ship consistently, then add custom programming for vr only where it improves the buyer experience.
Setting Up Your Development Environment
If you're building a custom tour, your first milestone is not polish. It's getting a headset-connected project running on your machine without errors.

The good news is that this ecosystem is mature. The consumer VR market was estimated at over $16 billion in 2024, with software accounting for $4.3 billion, which is part of why developers can rely on established engines like Unity and Unreal to target major headsets without rewriting code for each device.
A clean setup beats a clever one
For a real estate tour, keep your environment boring. Boring is good. It means your build pipeline is stable.
Use this baseline:
Install the engine you chose
- Unity Hub plus a current stable Unity version for Unity workflows
- Epic Games Launcher plus Unreal Engine for Unreal workflows
- A modern browser stack and local web server tooling for WebXR
Add the XR packages early
- In Unity, install XR support before importing property assets
- In Unreal, enable the VR-related plugins before building interaction logic
- In WebXR, confirm browser compatibility on your target devices first
Connect your target headset
- Don't wait until the end
- Test on the actual hardware your client or buyer will use
Create a tiny test scene
- One room-scale environment
- One floor
- One interactable object
- One UI label or hotspot
- Version control: Use it from day one. VR projects accumulate large binary assets, scene files, and repeated build iterations. If your team edits scenes by emailing folders around, the project will drift fast.
- DCC tools: You'll likely need Blender, 3ds Max, Maya, or a CAD-to-engine export path for any true 3D property model.
- Image optimization tools: Even when your source is mostly stills or panoramas, you'll need to resize, compress, and standardize assets before import.
- Build target utilities: Whatever your headset vendor requires for deployment, install it before content work starts.
- Render a room-scale environment
- Track head movement correctly
- Accept one basic interaction, usually gaze, pointer, or controller ray input
- Use 3D when interaction matters
- Use panoramas when speed matters
- Combine both when you need a fast launch with a few high-value custom moments
- Scenes: One folder per property or per floor
- Textures: Group by room or material family
- Panoramas: Name by physical location, not by export date
- Models: Separate shell, furniture, fixtures, and decor
- UI assets: Icons, labels, floorplan overlays
- Rename everything on import: Room_MasterBedroom_WindowWall is better than mesh_0042.
- Break giant models apart: Separate walls, floors, furniture, and fixtures so you can optimize selectively.
- Compress duplicate textures: Reused wood, tile, and paint materials shouldn't inflate the project.
- Author for the target device: A desktop showcase can tolerate more than a standalone headset.
- Shows valid destinations clearly
- Prevents landing inside furniture or walls
- Keeps orientation predictable
- Limits distance jumps that disorient the user
Explain an upgrade
A premium appliance package, imported tile, or smart-home system deserves a short note.Clarify layout
In open-plan homes, a hotspot can label transitions between dining, living, and flex areas.Support off-plan sales
In pre-construction experiences, hotspots can show finish options, alternate layouts, or staged use cases.- Teleport anchors for moving room to room
- Information hotspots for finishes and features
- A floorplan reference that can be opened quickly
- Optional object inspection for layouts or material selections
- Too many unique materials: Every decorative object gets its own shader and texture set.
- Oversized images: Exported stills and panoramas stay far heavier than needed.
- Real-time lighting everywhere: Nice in previews, expensive in headset builds.
- Dense furniture kits: Staged interiors look good in screenshots but overload mobile GPUs.
- Cull what the user can't see: Occlusion culling is especially valuable in homes with many enclosed rooms.
- Reduce texture waste: A ceiling texture viewed at distance doesn't need the same budget as a hero kitchen backsplash.
- Combine repeated assets: Reused chairs, handles, frames, and decor should share data where possible.
- Watch physics costs: A property tour doesn't need expensive physical simulation on every object.
- Open the tour from the final delivery path: Not from the editor, not from a debug mode
- Verify every teleport location: Especially near stairs, balconies, glass walls, and tight bathrooms
- Check hotspot text legibility: Headset UI that looks fine on a monitor often fails at distance
- Walk the full property in one pass: Entry to exit, no skipping
- Confirm asset loading behavior: Missing scene files and broken references show up here
- Property detail pages where a buyer is already reviewing photos and specs
- Email follow-up after a showing or inquiry
- QR-linked brochures in sales offices or open houses
- Agent presentations on tablet, desktop, or headset depending on setting
That test scene tells you whether your environment is healthy. If tracking is unstable, controller input is broken, or the build won't deploy, you want to find out before importing a whole property.
What to install if you're actually shipping listings
A real estate marketer doesn't need a giant game dev stack. A VR developer does need a few essentials.
If you want a broader technical walkthrough alongside this real estate-specific one, Virtual Tour Easy has a comprehensive guide on VR development that's useful for comparing general workflow assumptions.
Test deployment before you import the first serious asset. If the empty project doesn't run cleanly on the headset, the finished property won't either.
The minimum viable hello-world for a property tour
For Unity or Unreal, your first working build should do three things:
After that, add one teleport point. If teleport works reliably, your technical foundation is far enough along to start property-specific work.
A visual walkthrough can help if you're setting this up for the first time.
The common setup mistake is downloading everything. Don't. Every extra plugin increases conflict risk. For programming for vr tours, install only what supports rendering, input, deployment, and your chosen asset pipeline.
Importing and Preparing Your Property Assets
A property tour lives or dies on asset quality. Not just visual quality. Structural quality. If your files are disorganized, oversized, or inconsistent, the scene becomes hard to maintain long before launch.
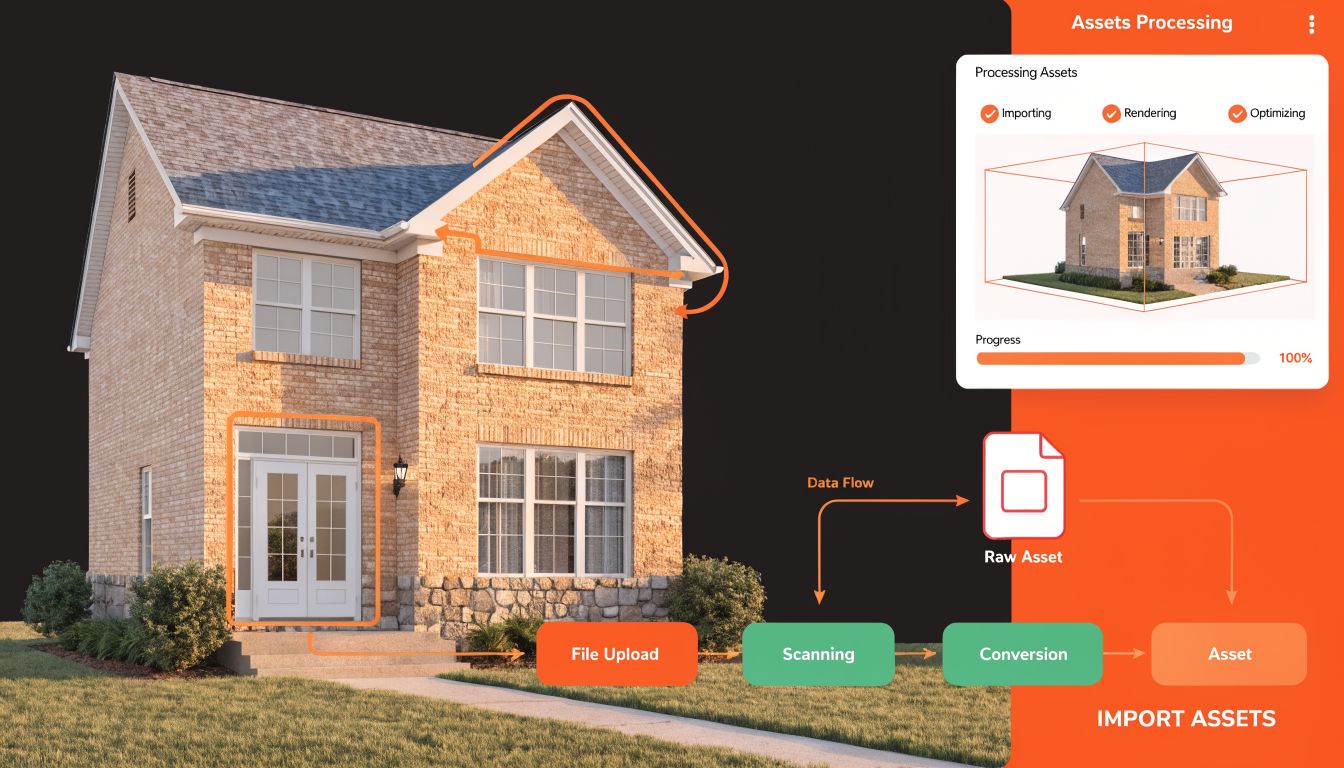
Choose between true 3D and panoramic media
There are two practical asset types for real estate VR.
Full 3D models give you the most freedom. You can let users move naturally, inspect layout changes, switch materials, and view unbuilt spaces. They're ideal for new developments, renovations, and marketing before photography exists.
360 imagery is faster and often more photorealistic for existing homes. You place the user inside captured viewpoints and move them between nodes. That limits movement, but it also reduces production cost and development complexity.
Here's the trade-off in plain terms:
A workable asset pipeline for listing teams
A lot of agents already have source material from walkthrough video, still photography, staging variants, or design mockups. AI-assisted media workflows can bridge the gap between raw marketing content and VR-ready assets.
For example, if you're already working from cleaned-up property visuals or staged imagery, this kind of prep fits naturally with a broader virtual staging guide. The point isn't to force staging into VR. It's to make sure the imagery entering your engine is coherent, attractive, and organized.
A practical folder structure helps more than commonly realized:
If a kitchen panorama is named Final_v2_new_realfinal.jpg, the project is already in trouble.
Import decisions that save time later
When importing, standardize scale first. A doorway that imports too small or a countertop at the wrong height immediately breaks trust in a property tour.
Then fix materials. Real estate scenes don't need cinematic material graphs everywhere. They need believable surfaces, controlled reflections, and lighting that doesn't make rooms look misleading.
If your source models come from architectural workflows, you'll often need cleanup after export. There's useful context in Armox Labs' piece on mastering Enscape for Revit, especially if your pipeline starts in design software and ends in an interactive presentation.
A few asset prep habits consistently work:
For real estate programming for vr, asset prep is where schedules are won or lost. If the property enters your engine cleanly, interaction work stays fast. If it enters as a mess, every later step becomes repair work.
Building Navigation and Key Interactions
The first version of a property tour should feel obvious to a buyer. They shouldn't need onboarding. They should put on the headset, look around, move to the next room, and understand what matters about the space.
That's why most successful real estate programming for vr starts with teleportation, not free locomotion. A buyer standing in a living room can point to the kitchen threshold, jump there, and continue the tour without the camera drifting or the motion feeling artificial.
The buyer journey inside the tour
A typical path looks like this.
The buyer starts at the entry. They see a subtle marker near the living room. They point, confirm, and teleport. In the kitchen, a hotspot appears over the island and shows a short panel about the countertop material and appliance package. In the primary suite, they grab a floating floorplan thumbnail, enlarge it, and confirm how the bedroom connects to the bath and closet.
None of that is game-like. It's sales support.
Teleportation that doesn't annoy people
A good teleport system does four things:
In Unity, this often means placing teleport anchors in obvious standing zones such as room centers, hallway transitions, and balcony thresholds. In Unreal, the same logic applies even if the implementation details differ.
The mistake is overpopulating the scene with markers. Buyers don't want to hop every few feet. They want a curated set of positions that reflects how a showing unfolds.
Place teleport points where a person would naturally pause during an in-person tour, not where the floor mesh happens to be empty.
Hotspots that add value
Most hotspots in real estate tours are too noisy. They either clutter the scene or repeat brochure copy the buyer already saw.
Useful hotspots do one of three jobs:
Keep them gaze-activated or pointer-activated. Avoid forcing buyers through menus. A good hotspot feels like a whisper, not a pop-up ad.
Grab-and-inspect interactions
This interaction is optional, but it can work well for condos, model units, and developments. Let users pick up a miniature model, a finish board, or a floorplan slab and rotate it in front of them.
That gives the buyer a second scale of understanding. They can be inside the unit, then step back and inspect the whole layout.
What doesn't work is trying to make every object grabbable. Real estate isn't a sandbox. One or two intentional inspectable elements are enough.
A reliable property tour usually includes:
If you build only those interactions well, the tour will already outperform many overengineered demos.
Optimizing for a Smooth and Comfortable Experience
The fastest way to ruin a property tour is to make someone uncomfortable in the first minute. Buyers won't describe that as a frame timing issue. They'll just say the experience felt bad.
What those performance terms mean in a property tour
Framerate is how consistently the scene updates. In practice, the user experiences this as smooth or choppy head movement.
Draw calls are the engine's rendering workload from many separate objects or materials. Too many individually rendered pieces in a furnished condo can drag performance down quickly.
Texture memory is the cost of all those high-resolution wall, wood, fabric, and staging textures you imported. Property tours often suffer here because marketing teams love big images and headsets don't.
Where real estate scenes usually go wrong
The usual problems are predictable.
The fix is rarely dramatic. It's disciplined.
The optimizations that matter most
Start with lighting. Bake what you can. A static interior with predictable lighting conditions is the perfect candidate for baked light where your workflow allows it.
Then simplify materials. Real estate needs believable finishes, not extravagant shader complexity.
Use these checks before every serious test build:
Buyers forgive a slightly simpler lamp material. They do not forgive a headset experience that feels unstable.
Test on target hardware early
A scene that feels perfect in the editor can fail immediately on a standalone headset. That's why test order matters.
Run the tour in the headset as soon as one representative room is working. Don't wait for the whole house. The primary comfort risks show up early: turning, room transitions, UI readability, and whether motion feels locked to the user's head properly.
I also recommend testing with someone who hasn't seen the project. Developers unconsciously learn where stutters happen and start compensating. First-time users don't. Their reaction is the one that matters.
For programming for vr in real estate, optimization isn't polish at the end. It's part of authorship. The way you choose assets, movement, lighting, and UI determines whether the listing feels premium or amateur.
Deploying Your Tour and Integrating with Listings
A build isn't done when it runs on your machine. It's done when a buyer, agent, or leasing prospect can open it without confusion.
Project discipline pays off at this stage. Professional VR development separates real-time rendering, interaction logic, and asset management into distinct layers, and for real estate tours that matters during packaging because large binary assets and scene files can easily break the final build if the project structure and version control are sloppy.
Package for the channel, not just the device
There are usually three delivery modes that matter in real estate.
Headset app delivery works for in-office demos, broker opens, and sales centers. You build the app for the target headset and install it directly.
WebXR or browser-linked delivery works when you want lower friction and easier sharing.
Desktop kiosk delivery still matters for development presentations and staffed demo environments.
Each one needs a slightly different review pass. A headset app needs comfort and controller testing. A browser build needs faster loading and simpler onboarding. A kiosk build needs reliability over a long session.
Final test checklist before launch
Don't test like a developer. Test like a listing team under deadline.
A mobile-first workflow can also matter for agents presenting inventory on the go. If that's relevant to your team, a dedicated mobile app workflow is worth considering as part of the broader property presentation stack.
Where the tour belongs in the sales process
The highest-value placement is usually not “somewhere on the website.” It's attached to a real listing workflow.
Good placements include:
The biggest deployment mistake is publishing the tour without context. A buyer should know what they're opening. Existing home walkthrough, staged concept, pre-construction visualization, or alternate layout. Label it clearly.
A VR tour works best when it supports a decision already in motion. It shouldn't replace the rest of the listing package. It should make that package easier to trust.
Bounti Labs helps real estate teams turn a simple walkthrough video into polished marketing assets fast. If you need cleaner property visuals, MLS-ready stills, AI staging, decluttering, or renovation-ready presentation materials before you build immersive experiences, Bounti Labs is built for that workflow.