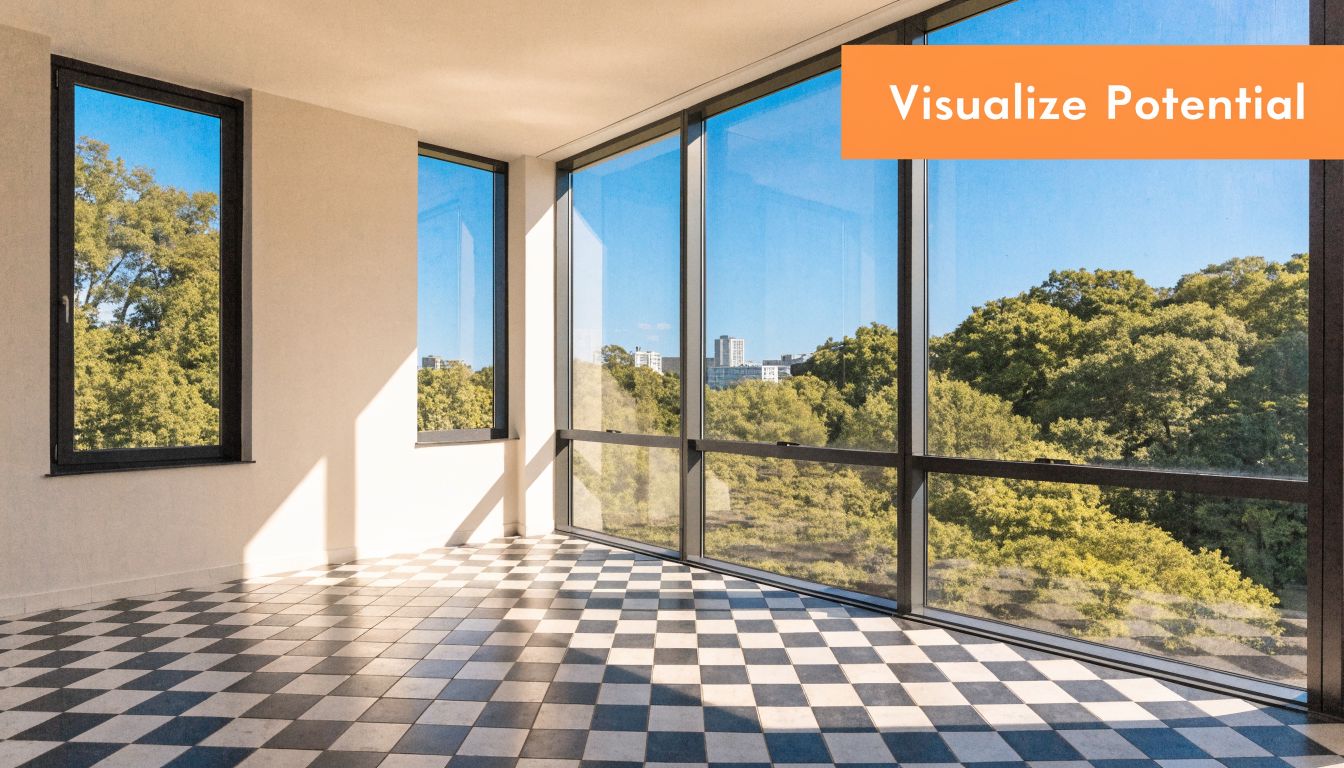
You’ve got the listing live. The photos are clean, the price is reasonable, and the home itself shows well in person. But online, it looks flat because it’s empty. Buyers scroll past it, or worse, they click through and never book a showing because they can’t tell whether the living room fits a sectional or how the spare bedroom should function.
That problem isn’t new. What’s changed is the workflow. Virtual staging for real estate photos used to mean slow revisions, inconsistent quality, and outsourcing every small change. Today, AI makes it practical to stage, restyle, declutter, and publish faster without turning your listing process into a design project.
Used well, virtual staging isn’t decoration. It’s a listing strategy. The agents who get the most value from it don’t treat it as a one-off visual trick. They treat it as part of the full marketing pipeline, from how the room is photographed to how the final image is labeled in the MLS.
Why Virtual Staging is Required for Listings in 2026
An empty listing hits the market on Thursday. By Friday, buyers have already judged the photos.
They are not standing in the room testing furniture layouts or measuring wall space. They are scrolling on a phone, comparing your listing against staged homes that explain the space in seconds. If the room feels undefined, cold, or smaller than it is, interest drops before a showing is ever scheduled.
Buyers judge the listing before they judge the property
Virtual staging matters because online presentation now does a large share of the selling work. Empty rooms force buyers to solve basic questions on their own. Does the living room fit a sectional? Can the loft work as an office? Is the second bedroom actually usable, or just technically a bedroom?
Agents who answer those questions visually get more qualified interest.
That is the business case. Better interpretation leads to stronger engagement, better showing intent, and fewer listings that get dismissed for avoidable reasons. The point is not to make every home look expensive. The point is to make the home readable.
A simple rule works well in practice.
Stage any room where the use, scale, or buyer fit is not obvious in the original photo.
That usually includes vacant living rooms, secondary bedrooms, bonus rooms, dining areas, and awkward flex spaces. Clear function improves click-through and cuts down on the “I’m not sure what I’m looking at” problem that hurts empty listings.
AI changed the workflow, not just the cost
The bigger shift in 2026 is operational. Virtual staging used to sit outside the core listing process. Photos went out to a designer, revisions took time, and even small changes could delay launch. AI brought staging into the normal production cycle, where agents can test a look, revise it, disclose it properly, and publish without slowing down the listing.
That matters because speed affects results. A good workflow lets the team shoot, edit, stage, review, and prep compliant MLS assets in one coordinated sequence. If you already care about strong source images, HDR real estate photography techniques for listing photos give the AI a cleaner file to work from. If an image needs more resolution before staging or export, teams also upscale real estate photos with AI to avoid soft-looking final renders.
The tool is only part of the advantage. The workflow is where agents gain ground.
Where virtual staging fits, and where it does not
AI virtual staging is a strong middle option, but it is not the answer to every listing challenge.
- Empty photos are fast to publish, but they put too much interpretation work on the buyer.
- Physical staging can improve in-person impact, but it adds scheduling, labor, furniture logistics, and higher upfront cost.
- AI virtual staging gives agents speed and flexibility for online marketing, as long as the base photos are good and the edits are disclosed correctly.
That trade-off is why more teams now treat virtual staging as a standard listing asset, not a special request. It helps vacant homes compete at the moment that matters first: the initial online comparison.
Preparing Your Photos for Flawless Staging
The final render can’t rescue a bad source image.
If the room is dark, tilted, blurry, or shot at the wrong height, the staged result will still feel off. The software may insert furniture, but buyers will notice when shadows don’t make sense or the room looks distorted.

Start with clean, usable files
For professional results, your source photos should be at least 3000x2000 pixels and shot in consistent natural lighting. Poor inputs like blurry or low-resolution photos lead to results that 70-80% of discerning buyers reject, according to BluEnt’s guide to virtual staging mistakes.
That’s why the photography phase matters more than most agents think. Virtual staging isn’t an editing shortcut for weak media. It’s an enhancement layer for strong media.
A few shooting habits improve outcomes immediately:
- Use corner angles thoughtfully. They reveal floor area and help the AI place furniture in a believable layout.
- Keep camera height consistent. Rooms look more natural when every major photo feels like it was captured from the same visual line.
- Let daylight do the work when possible. Mixed lighting creates color and shadow conflicts that make staged objects harder to blend.
- Shoot more than one angle of key rooms. This helps if you later want a cohesive look across multiple views.
Declutter before you rely on AI
AI decluttering is useful, especially when a seller can’t fully clear a room before the shoot. But it works best when you remove the obvious distractions first.
Take out pet beds, trash cans, loose cords, countertop clutter, and personal items if you can. Leave the hard cleanup for the software only when necessary. The cleaner the original room, the more believable the finished image will look.
The best virtual staging jobs start before the upload. Good photography removes problems that software shouldn’t have to guess at.
If you inherit photos that are usable but not ideal, it can still be worth improving them before staging. Tools that upscale real estate photos with AI can help recover detail for listing use, especially when you need sharper images for MLS and marketing channels.
Get lighting right before anything else
Many staging failures come from light, not furniture choice.
A room with blown-out windows, muddy corners, or uneven exposure gives the AI inconsistent visual cues. That’s where bracketed shooting and proper HDR processing can make a real difference. If your photo workflow needs tightening, this guide to HDR photography for real estate is worth reviewing before your next shoot.
Later in the process, seeing a walkthrough of practical staging prep helps more than reading a generic checklist. This video is useful for that:
A simple pre-staging checklist
Before you upload anything, confirm these basics:
- Resolution is high enough. Don’t send compressed listing exports if you still have originals.
- The room is photographed straight. Vertical lines should look vertical.
- Natural light is consistent. Avoid one image in warm lamp light and the next in cool daylight.
- Clutter is minimized. Especially on floors, counters, and shelves.
- You have alternate views. They’re useful for consistency and later optimization.
Agents often focus on the staging prompt or furniture style first. In practice, the quality of the source photo decides whether the final result looks polished or amateur.
The AI-Powered Virtual Staging Workflow
The fastest way to waste time with AI staging is to treat it like a novelty tool and generate random room designs until something looks decent.
The better approach is operational. Start with the media, make a few strategic choices, review with a compliance mindset, then publish. When the workflow is tight, virtual staging becomes repeatable across listings instead of depending on trial and error.
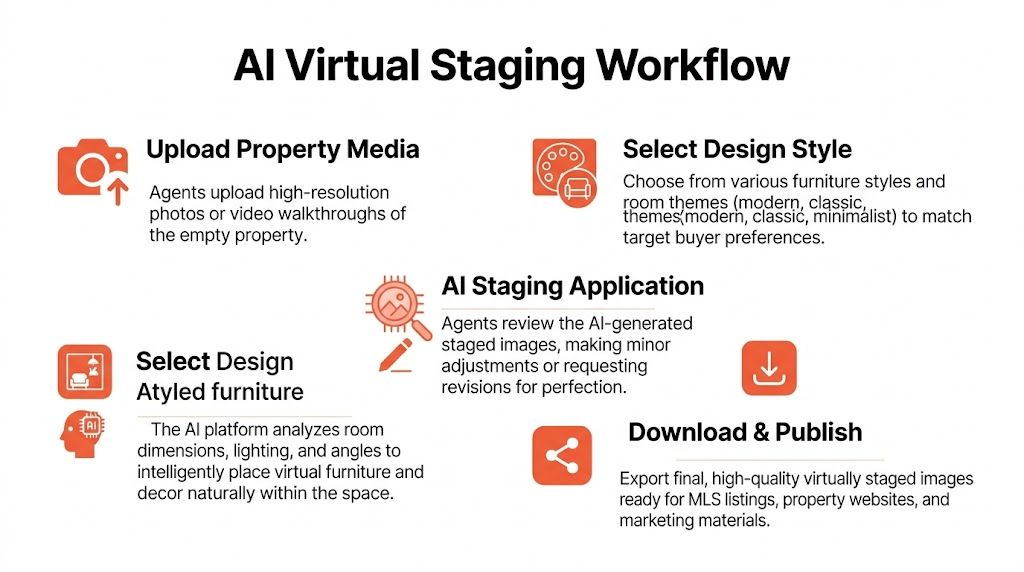
Step one is media intake, not design
Upload the highest-quality room photos you have. If your platform supports video walkthroughs, those can be useful too because they provide more visual context for angles, room relationships, and still extraction.
Modern tools differ from the old vendor model. Instead of emailing files, waiting for manual edits, and managing revisions in a separate loop, you can move from media intake into staging choices directly. Platforms such as Collov, other AI staging apps, and Bounti can handle the transformation process inside one workflow, including still generation, decluttering, staging, and export.
If you’re comparing options, this roundup of AI photo editing software for real estate is a useful place to benchmark features and fit.
Clear the room before you furnish it
In many listings, the first AI task shouldn’t be staging. It should be removal.
A half-empty room with outdated furniture usually stages worse than an empty one because the software has to work around existing visual clutter. Use AI decluttering or item removal first, then decide whether the room needs a fresh furniture layout, a style change, or both.
Good candidates for decluttering include:
- Inherited furniture from a tenant
- Personal decor that dates the room
- Bulky pieces that make the floor plan harder to read
- Visual noise that distracts from windows, flooring, or room size
Once the room is clean, the AI has a better base for believable placement.
Match style to buyer expectations
Many agents miss easy wins. They pick the style they personally like instead of the one that fits the property, price point, and likely buyer.
A downtown condo, a suburban family home, and a mid-century property shouldn’t all get the same furniture package. Virtual staging works best when the style supports the story you’re telling about the home.
| Style | Key Characteristics | Best For |
|---|---|---|
| Modern | Clean lines, simple silhouettes, restrained decor, neutral palette | New builds, condos, updated suburban homes |
| Scandinavian | Light woods, airy layouts, soft neutrals, minimal but warm styling | Smaller spaces, bright interiors, younger buyer audiences |
| Farmhouse | Comfortable seating, natural textures, casual warmth, approachable finishes | Suburban homes, family-oriented listings, traditional layouts |
| Industrial | Darker accents, metal elements, open-space styling, urban edge | Lofts, converted spaces, city properties with raw architectural features |
The goal isn’t to impress an interior designer. It’s to make the room instantly legible to the buyer who’s most likely to want the property.
Choose the style that reduces friction for the buyer, not the style that gets the most compliments from other agents.
Review like a marketer, not just a designer
Once the image is generated, zoom in.
Check object scale first. Then check whether shadows line up with the room’s real light sources. Then look at contact points. Furniture should feel grounded on the floor, not slightly floating. Rugs shouldn’t break perspective. Art shouldn’t be hung at impossible angles.
A short review pass usually catches the problems that kill trust:
- Sofas that are too large for the wall
- Dining tables that block obvious walking paths
- Beds placed where they couldn’t exist in real life
- Decor that looks copied and pasted across rooms
This is also the point to generate alternatives. One room may need a more minimal look. Another may benefit from a home office layout rather than a guest room setup. AI makes this easy, but only if you’re evaluating based on audience fit, not novelty.
Publish the staged version and the original
The strongest workflow ends with both assets ready to go. Use the staged image where it improves clarity. Keep the original available for transparency, compliance, and buyer trust.
That one habit does more than reduce risk. It also makes your marketing feel more professional because buyers can see the room’s potential without feeling misled.
Navigating MLS Compliance and Disclosure
Virtual staging becomes a liability when agents treat disclosure like an afterthought.
The issue usually isn’t adding a sofa to an empty living room. The issue is publishing altered images without telling buyers what changed, or pushing edits beyond presentation into misrepresentation.

The safest rule is simple
If the image has been digitally staged, say so clearly.
According to a 2026 Redfin analysis, up to 40% of listings using virtual staging are non-compliant with NAR’s guideline requiring a “Virtually Staged” watermark or caption, which can trigger buyer backlash and erode trust, as summarized in StagerAI’s compliance discussion.
That should change how agents think about disclosure. It isn’t just a box to check for MLS policy. It’s part of expectation-setting.
What’s usually acceptable and what crosses the line
Adding furniture, rugs, art, and decor to an empty room is generally the intended use case. Showing layout potential is the point.
The risk rises when edits alter the property itself. Removing a structural issue from view, changing permanent finishes without context, or digitally hiding defects turns a marketing image into a problem.
Use this working standard:
Usually acceptable
Furnishing an empty room, restyling decor, or presenting a vacant bedroom as an office.Needs caution
Changing wall colors, showing renovation concepts, or swapping design finishes. If you do this, labeling and context matter even more.Avoid for listing presentation
Hiding damage, removing permanent flaws, changing room dimensions visually, or creating features that don’t exist.
Transparency makes the staged image stronger, not weaker. Buyers are far more comfortable when they know they’re looking at a concept version of the real room.
How to disclose without making the listing clunky
Keep the language plain. “Virtually Staged” works because it’s short and direct. You can use it as a visible watermark, a caption in the image set, or listing copy where MLS rules allow.
Operationally, the cleanest process is:
- Export the staged image
- Apply the disclosure label
- Keep the original photo in the same asset set
- Make sure agents on your team use the same wording every time
If you work in markets with stricter state-level AI and advertising rules, it’s smart to review a more detailed compliance breakdown such as this guide to California AB 723 and AI real estate photos.
Credibility is part of conversion
Buyers don’t object to virtual staging because they hate technology. They object when the in-person experience feels different from what they believed they were seeing online.
That’s why the best agents use disclosure as a credibility signal. A clearly labeled staged image says: this agent is helping you visualize the home, not trying to fool you. In a market where a lot of listing media feels slippery, that matters.
Measuring ROI and Optimizing for Performance
Most agents can tell when staged photos “look better.” That’s not enough.
If you want virtual staging to improve your listing process, measure it the same way you’d measure ad creative or lead source quality. Better images should change buyer behavior. If they don’t, either the media, the style choice, or the room selection needs work.
Start with the metrics that actually matter
Focus on operational signals tied to the listing, not vanity feedback from colleagues.
Track things like:
- Showing activity after the new photos go live
- Which rooms get featured first across portals and social posts
- Inquiry quality from buyers and agents
- Whether vacant listings move faster once staged media is introduced
- How often sellers mention the photos when choosing you
If you’re running paid campaigns around listings, structured marketing tracking for real estate helps connect creative changes to downstream actions instead of guessing which visual updates made the difference.
Use multi-view consistency as an advantage
One of the most interesting workflow upgrades right now is multi-view consistency. Instead of staging one angle of a room and leaving the other angle empty or differently styled, you carry the same design language across the room’s photo set.
That sounds cosmetic, but it solves a real trust problem. Buyers notice when a living room has one sofa layout in one image and a different one in the next. Consistency makes the listing feel more coherent and more believable.
A 2025 NAR survey noted that 68% of agents using AI staging report 20-30% higher offers, while only 12% currently use multi-view tools, suggesting an underused opportunity, according to Edensign’s discussion of multi-view virtual staging.
You don’t need to overcomplicate this. If you have two or three angles of the same room, keep furniture style, rug selection, color palette, and placement logic aligned across those views.
A practical optimization cycle
This is the workflow I’d use at the team level:
First, identify which room matters most to the property’s story. Usually that’s the living room, primary bedroom, or a flex space that needs help defining its purpose.
Then test one decision at a time:
Style test
Modern versus warmer transitional styling for the same room.Function test
Spare room shown as office versus guest room.Coverage test
One hero staged image versus multiple coordinated views of the same space.Publishing test
Portal gallery order, social post creative, and ad thumbnail selection.
Not every listing needs all of this. But if you handle volume, patterns emerge quickly. Certain neighborhoods respond better to cleaner, more minimal styling. Some floor plans need stronger scale cues. Some sellers only understand the value of staging when they see a side-by-side comparison of engagement.
If the staged room looks good but doesn’t increase response, revisit the room choice first. The wrong room staged perfectly still won’t move the listing.
What strong performance usually looks like
The strongest virtual staging outcomes share a few traits. The room was worth staging in the first place. The photography was solid. The style fit the buyer profile. The listing stayed transparent. And the presentation was consistent across channels.
That’s the edge. Not just better-looking photos, but a tighter decision system around which visuals deserve enhancement and how those visuals support conversion.
Frequently Asked Questions About Virtual Staging
How much does AI virtual staging usually cost
For most listings, AI virtual staging costs a fraction of physical staging. The exact price depends on image count, revision rounds, and whether you also need item removal, twilight edits, or MLS-ready exports. In practice, it works best as a repeatable marketing expense instead of a one-time design project.
Is virtual staging only for empty homes
No. Vacant homes are the clearest use case, but AI staging also helps when a room is dated, under-furnished, or confusing in function. I use it often for bonus rooms, basements, and spare bedrooms that need a clear buyer story.
Can AI remove furniture and clutter too
Yes. Many workflows start there.
Furniture removal, decluttering, and light cleanup are often the highest-value edits because they solve the underlying problem before any new furniture is added. That matters in tenant-occupied units, inherited homes, and listings where bulky pieces make the room feel smaller than it is.
What makes a virtually staged photo look fake
Poor input usually causes it. Wide-angle distortion, low light, crooked verticals, and soft focus make even good staging look artificial.
After that, the common failures are predictable. Oversized furniture, shadows that do not match the room, layouts that block natural walk paths, and decor that ignores the price point of the home. A downtown condo and a suburban family home should not get the same staging package. Good results come from matching style, scale, and buyer expectations, then reviewing every image before it reaches the MLS.
Should I include the original photo too
Yes. It keeps disclosure cleaner and reduces surprises at showings.
A simple side-by-side file set also helps the team work faster. Agents, coordinators, and compliance reviewers can confirm what changed without chasing edits across email threads.
Which rooms should get staged first
Start with the room that sells the listing online. That is usually the living room, primary bedroom, dining area, or a flex space that needs definition. Skip rooms that already read clearly in the photos, because staging every image rarely improves performance.
Is physical staging still worth doing
Sometimes. Luxury listings, vacant new construction, and homes built around an in-person wow factor can still justify physical staging.
The practical split is simple. Use AI staging to improve online presentation at speed and lower cost. Use physical staging when the property needs the showing experience itself to carry more weight.
How do I keep the process efficient across multiple listings
Build a system. Shoot with staging in mind, use a short approved style library, require disclosure on altered images, and keep one review step for realism and MLS compliance before anything is published.
That is where teams gain an advantage. The workflow starts at the photo shoot, moves through AI editing and approval, and ends with channel-specific exports that are ready for MLS, portals, social, and seller updates. Bounti Labs helps real estate teams turn a single walkthrough into MLS-ready photos, staged images, decluttered visuals, and listing materials without sending work through a slow manual editing chain. If you want a tighter workflow for virtual staging for real estate photos, Bounti Labs is worth a look.